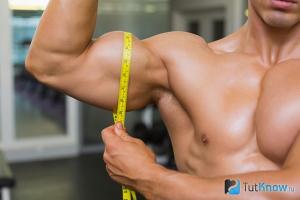
Excess weight, lack of exercise, poor diet, bad habits and other negative effects on the human body never go unnoticed. All organs are affected, but the spine is most damaged. It bears the main burden and is responsible for the normal functionality of the body. Mechanical or sports injuries of the spinal column are especially important; these injuries can cause complete paralysis.
Valentin Dikul himself had a severe injury; most doctors predicted that he would have, if not complete immobility, then extremely limited motor functions. Dikul managed to independently develop an effective method for completely restoring the vital functions of the spine and not only recovered, but also returned to the circus arena.

Subsequently, he improved his technique, due to this the boundaries of its capabilities significantly expanded. Tens of thousands of patients, using the developed methods, were able to return to a full life after complex injuries and illnesses. Even more people have been able to reduce the effects of spinal diseases or prevent their development.

Dikul exercises - full course
One of the most complex diseases, doctors often recommend only surgical intervention. But all spinal surgeries are very dangerous; no one gives a 100% guarantee of success and never excludes an extremely negative result from spinal cord damage. The consequence of such injuries is paralysis of the lower limbs.

A spinal hernia appears as a result of metabolic disorders in the tissues of the discs, mechanical injuries or excessive physical exertion; the nucleus pulposus protrudes and pinches the nerve endings. As a complication, paralysis of the legs and impaired functionality of the hip organs may occur. Of course, severe pain is felt during movement, lifting weights and awkward turns of the body.

Method of treating spinal hernia from Dikul
After finishing his work in the circus, Dikul began studying medicine, has the title of academician, and approaches treatment problems very competently and carefully. The main principle of healing - do no harm - is observed by him unquestioningly. The treatment method combines the use of traditional medicine with our own scientific developments. It does not promise an immediate recovery; an improvement in the quality of life can only be achieved in close cooperation between the patient and the doctor.
General instructions for exercise systems
Taking your time is one of the main principles of Dikul’s work. Many patients, after relieving primary pain in the spine, immediately try to increase the load, thus hoping to speed up the process of complete recovery. This is a big mistake, you absolutely cannot do this. The doctor “accompanies” the patient from simple to more complex; only after preparing the muscle corset can the load on various muscle groups be gradually increased.

All exercises are divided into three groups.
| Well | Description |
|---|---|
| Gentle course | Prescribed during the initial period of treatment. Gentle exercises should be done without stress, regardless of what initial physical fitness the patient has. Do not allow the slightest feeling of overexertion or fatigue. The complex is aimed only at preparing the sick body for further recovery. Exercises should restore lost nerve connections between the spinal cord and muscle tissue. |
| Intermediate course | The second stage of treatment can take up to 20% of the total duration. The specific time depends on the stage and complexity of the disease, the preparedness and conscientiousness of the patient and the individual characteristics of the body. |
| Difficult course | The exercises are aimed at restoring muscle strength in the damaged area of the spine and consolidating the positive results obtained. Only strong muscles will be able to support the body in a physiological position and relieve stress on the spinal discs. And these are the main conditions for fixing positive changes in the body for a long period of time. |
Only after working out in full and with a full load of the movements of the previous course, the technique is allowed to proceed to the next one. There are no specific deadlines; it all depends on the condition of the patient’s body and the patient’s focus on recovery. The second, psychological, factor is very important. Another very important condition is consistency of practice. Dikul recommends exercising at least three times a week.

Self-control
Few people can afford the constant presence of a trained instructor or doctor during exercise; you need to monitor the state of the body yourself. You can contact health workers only for periodic consultations in case of unpleasant sensations.

All provisions of the Dikul method must be observed independently; no sudden changes in the direction of increasing loads are allowed. If your health temporarily deteriorates, do not panic; you need to slightly reduce the load and continue exercising. It is advisable to keep a personal diary and record data on your well-being in it. How did your appetite, sleep, and pulse change before and after classes? If a patient falls ill with a viral infectious disease, then a pause should be taken during recovery.

Rules for performing therapeutic exercises
Dikul advises strictly following the developed methodology and not making your own changes.
- It is forbidden to change the order of exercises or increase the number of approaches and repetitions. If it becomes very easy, then increasing the load is allowed.

- The intensity should depend on personal well-being; the body should be accustomed to stress gradually, without sudden overloads or long breaks. You should always pay attention to changes in well-being and change the load depending on the sensations. At the first unfavorable sensations, you should consult a doctor.

- You cannot make sudden movements. You need to move your torso or limbs with the same rhythm in all directions. Air should be inhaled during tension, exhale during relaxation. You need to breathe calmly and shallowly; delays during exercise are not allowed.

- Acute pain is a warning signal for hanging exercises. If you do not follow the rule, you can further injure the spinal discs. It is recommended to perform the exercise while lying down to make the exercise easier. They move on to the crossbar or wall bars after completing the first courses and strengthening the muscular corset of the spine.

Dikul constantly reminds that any attempts to speed up recovery by sharply increasing loads can backfire.
A set of exercises for the back
With the help of these exercises, not only pain is relieved, but also the muscle corset is significantly strengthened, connections between nerve endings and muscle tissue are restored. All Dikul exercises are performed with spinal traction, which allows you to increase the interdisc space to physiological levels and relieve abnormal irritation of the nerve fibers of the spine.

To perform the complex, you will need a rubber bandage (can be purchased at pharmacies or sports stores) and loops for attaching to the arms and legs.

Due to the loops, tensile forces are evenly distributed around the circumference of the ends and discomfort is relieved. At the final stages of treatment, the use of dumbbells, expanders, and other weights is allowed. The rubber bandage must be attached to the legs or arms and any fixed support in such a way that its length does not interfere with the movement of the limbs. The tension force is adjusted individually; do not stretch the spine too much; the tension force should be increased gradually.

Much attention is paid to proper breathing; rhythm disturbances significantly reduce the effectiveness of therapeutic exercises.
Several exercises while lying on your back or stomach
Preconditions: acute forms of the disease have been eliminated.
- You need to lie with your back on the floor, attach loops to your legs, and tie rubber bandages to them. The length of the bandages must be at least one and a half meters. The arms are slightly outstretched. Now you need to slowly turn your left thigh to the maximum angle to the right, the back of your head and shoulders should be motionless. You should stay in the rotated position for 2-3 seconds. and just as slowly return to its original state. Next, the same movement is performed with the second thigh. Eight turns to the side are considered one approach. Rest is a prerequisite for training; relax for at least two to three minutes after each approach. Three approaches per exercise.

- Spread the sides of your arms slightly, change the position of your legs and close them, pull your toes towards you. To prevent your legs from moving during movement, tie them with bandages. There are times when the body moves; to prevent this phenomenon, hold on to stretched rubber bandages with your hands. Move both legs to the left, your feet should slide along the surface. It is recommended to stay in this position for a few seconds and repeat the movements in the other direction.
- The IP does not change, only in addition to the legs, the arms are also fixed with bandages. Feet should be shoulder-width apart, arms should be crossed over the chest. Rotate each shoulder in turn, while trying to keep the rest of your body on the floor. You need to stay in the rotated position for a few seconds, then repeat everything with the second shoulder. One approach - eight turns in each direction. It is necessary to do three approaches.

- Rest a little, walk slowly in a circle. When the pulse and breathing are restored, you can continue exercising. Lie on your stomach, arms extended. To make the movements easier, you can rest your heels on any piece of furniture. Slowly raise your torso to the maximum height, while your back should bend. Stay in the elevated position for a few seconds and lower your torso.

- Lie on a flat, hard surface with your back down, stretch your arms down, bend your knees at a right angle, place your feet on your toes. The exercise is done to stretch the spinal discs; to do this, slowly raise your bent legs as close to your chest as possible, stay in this position for 2-3 seconds and slowly return to the starting position.

- The starting position is the same. Now, at the same time as you pull up your legs, lift your shoulders, try to bring your knees and shoulders together as close as possible.

Exercises while standing
In all cases, posture should be as straight as possible; it is not allowed to bend the spine while performing power movements. Each approach has eight repetitions in each direction. For all exercises you should do three approaches.
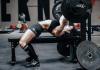
- Stand up straight, straighten your back, grab a stick with both hands and hold it horizontally below. Slowly lower yourself down, keeping your back straight and your knees slightly bent. The position should resemble that of a weightlifter when lifting a barbell, and the stick plays the role of a bar. Knees bent, stay in this position for a couple of seconds. You need to look ahead of you, breathe correctly, exhale at maximum tilt.

- Step on the end of the bandage with your foot, and hold the other end in the same hand; the rubber should be taut; the tension force should be adjusted taking into account your physical capabilities. Place your other hand on the back of your head. Slowly tilt your body to the side; the increasing tension of the rubber should create noticeable resistance. Then change the position of the bandage and repeat all movements. You need to stay in the bend for a few seconds. Instead of a bandage, you can use an expander.


Gymnastics on the horizontal bar or wall bars
For the final stage of rehabilitation. If the patient cannot hang on his own, then loops can be used to secure the arms or body. You can practice on a horizontal bar or a wall bars; a slow pace is chosen for the exercises.
- Hang on the bar and turn your pelvis in both directions, fixate in each turn for 2-3 seconds.

- Hang on the bar, pull your knees to your chest. Stay in this position for a few seconds and straighten up.

- In the same position, move both legs alternately to the right and left.

- Tie a towel under your arms so your body weight will be concentrated on it. In a hanging position, bend back and simultaneously move both legs behind your back.

Dikul considers the main condition for successful treatment of spinal diseases to be the desire of the patient himself to be healthy. This should always be remembered.
Video – A set of exercises using the Dikul method
INTRODUCTION
The author of this unique book, Valentin Ivanovich Dikul, has developed many programs that can help cure almost any disease of the spine. And those who have not yet been affected by the disease should be taught what needs to be done so that the disease never occurs. Personal experience, a terrible tragedy, and numerous injuries prompted Dikul to study the human body.
When aerialist Valentin Dikul fell from under the circus dome from a great height, broke his spine and received severe traumatic brain injuries, his future was predetermined - a wheelchair.
And no more circus! He couldn't come to terms with this. Having gone through all the circles of hell, Dikul found the strength not to despair and not to give up. He believed that his young body would defeat the disease. To do this, you only need two things: knowledge and daily training. Studying specialized literature and studying for 5–6 hours every day, Valentin Ivanovich created his own recovery system. He not only got back on his feet, but went back into the arena and became the best power juggler in the world! Dikul received public recognition for his many years of hard experience, achieving everything literally with sweat and blood.
The higher his results were, the more people he helped. His example gave hope to other people in similar situations. Valentin Ivanovich has developed many programs that are prescribed to the patient strictly individually: taking into account his illness and related ailments. Just as there are no identical organisms, there are no identical diseases. Everyone has their own recovery program and their own time frame for recovery. The recovery technique developed by Dikul and tested on thousands of people is used in many countries where specialists trained by him work. Any person gets the opportunity to have a beneficial effect on their physical condition, successfully fight diseases, increase endurance and interest in life. Valentin Ivanovich constantly treats and advises patients. During all this time, he returned to normal life over 10 thousand people whom medicine was unable to help.
Back diseases are noticeably younger today. The reasons are in ourselves - we lead too much of a sedentary lifestyle. Scoliosis is considered the most common spine disease today. It is found even in babies! This book is based on exercise systems aimed at combating this particular disease. They are suitable for both young and old. Not everyone is comfortable visiting the physical therapy room at the clinic with their children. Not every family can afford to pay for a sports club. But anyone can read a book where the problem is described in clear language and visual illustrations show how to overcome it. If you have back problems, first learn to overcome laziness, ignorance and stubbornness. And then find the strength to do it yourself. And a positive result will not take long to arrive! Dikul doesn’t have it any other way. “Youth does not lie in age, youth lies in strength,” Valentin Ivanovich likes to repeat. With his personal example, Dikul inspires patients to fight the disease, gives hope and faith in victory!
FROM THE AUTHOR
Dear readers!
Today I will introduce you to a system of exercises that can help cure osteochondrosis!
We will also talk about how we acquire these diseases for ourselves. The spine is the center of the body. Everything else adapts to it. This is why malfunctions and distortions can cause many diseases. Headaches, pain in the chest, shoulder blades, lower back - this is not a complete list of possible problems.
Because we sometimes don’t think about how we sit, what we sit on and how long we sit. How we eat and how much we eat. How, how much and - most importantly - what we sleep on. My many years of experience allow me to speak with confidence about this: I have collaborated with many specialists in various fields, created armchairs, stools, and mattresses.
I really want to help you get rid of pain, because when there is no pain, a person becomes kinder and more joyful. He sees blue skies, bright sunshine, and not everything is gray and foggy. Therefore, I want you to smile more often, look into each other’s eyes and speak kind words. And then there will be less evil in the world. I believe in this.
Therefore, you need to start a new life, like a new day, with exercise. Yes, yes, the same exercise that 80% of our population used to love so much. Please note that in many developed foreign countries, almost every yard and literally every apartment has an equipped corner for gymnastics. And we just have trouble with this! But our health depends on such little things! What is health? This is the main thing in our life. If you are healthy, everything will work out well: both at work and in your personal life.
What is the approach? This is when you, for example, do 12 repetitions of the same movement, then rest for 2-3 minutes, and again do as many repetitions as indicated. Under no circumstances should you perform an exercise if it causes you pain: all movements are performed only until pain appears. In this case, it is necessary to reduce the load - reduce the number of movements to a state of comfort, but not overpower the pain.
Also, do not forget to breathe correctly while performing exercises: at the highest tension of any movement, exhale, and when relaxing, inhale. If you are very tired and out of breath, it makes sense to rest a little more between approaches than indicated in the system.
Do not forget that the age of the patient who begins to practice according to my method and initial physical training are of great importance.
What is most important for practicing using my methods?
They should not become a one-time thing. If you think that after a little exercise you will achieve relief and stop there, you are mistaken. Sooner or later the condition will return to its original state, and you will feel pain again. Having started practicing “according to Dikul”, you must understand that from now on this exercise will become permanent for you. I don't say "daily" because you can't do my exercises more than three times a week.
And remember! If you don't take care of your spine, then over time your spine will take care of you. The spine is the basis of our health. In whatever state he will be, the person will be in such a state.
IN AND. Dikul
WHAT IS A SPINE?
The support of the human body is the spinal column, located in the center of the body. This is a segmental organ that consists of bony vertebrae:
Seven cervical;
Twelve breasts;
Five lumbar;
Five sacral (fused);
Three or four coccygeal (fused).
The bones of our body living, they are abundantly supplied with blood and penetrated by nerves, in them there is a continuous and rapid exchange of nutrients, especially the minerals calcium and phosphorus, as well as vitamin D. In the bone marrow, which is located in larger bones, blood cells are formed, which play a vital role role in immune reactions and oxygen transport throughout the body. Bones, connected by systems and ligaments, form the skeleton, which supports and protects soft tissues.
The seven cervical vertebrae support the head and ensure its balance. Upper two vertebrae at the base of the skull - atlas and epistropheus– act as a universal connection, allowing you to turn your head to the sides, tilt it back and tilt it forward.
Twelve thoracic vertebrae connected to the ribs, together they form the rib cage, which provides the lungs with sufficient freedom of movement during entry and protects many vital organs.
Five lumbar vertebrae form the lower spine - the lower back. They are connected to the sacrum.
Sacrum consists of five fused bones, which together with the pelvic bones form a container of bones to protect the reproductive organs and bladder.
Coccyx at the base of the spine it represents the remains of the caudal skeleton. It consists of three to four fused bones.
Between the bony vertebrae are cartilaginous discs, which give the spine elasticity and flexibility. A vertebra consists of a vertebral body, arches and spinous processes (Fig. 1). Located one above the other, the arches and processes form a bone canal. In the bone canal of the spinal column there is a spinal cord with nerve processes - roots, which, branching, go to all parts of the body and internal organs. The spinal cord guard connects the brain to the peripheral nervous system and carries sensory impulses from the body to the brain and, in the opposite direction, “instructions” for the muscles and their actions. If any part of the nervous system is disrupted, a “failure” occurs in the functioning of the organ that was innervated (that is, supplied with nerve cells) by this part, and this will lead to disease of this organ. Most often, disorders occur in various parts of the spine.
Picture 1
Vertebral structure
Spinal cord- part of the central nervous system. Its length is about 45 centimeters - from the brain to the lumbar vertebrae, where the nerves branch. This lower part is called cauda equine, translated from Latin as “horse or horse’s tail.” The spinal cord is cylindrical in shape and consists of blood vessels and a core formed by nerve fibers. The spinal nerves branch off from the spinal cord at regular intervals and pass through the gaps between the articular surfaces and the vertebral body. Then they branch, forming a network of small branches that penetrate certain areas of the body.
Throughout its entire length, the bone marrow is protected by a bone tube formed by vertebrae, small ligaments and muscles. It is washed by cerebrospinal fluid. The fluid absorbs shocks, protecting the spinal column from pressure.
So, the spine plays a key role in health.
It is the basis of the skeleton, gives the body the desired shape, layers of large and small muscles and ligaments of the back and abdomen are attached to it. If the spine is curved, then this affects the bones of the entire skeleton. Muscles and ligaments are shortened, internal organs are displaced, which leads to illness throughout the body.
The spinal cord can stretch to accommodate changing body positions and is difficult to damage. The spinal nerves are made up of millions of individual nerve fibers, or neurons. Each spinal nerve has a specific part of the body within its range of action, and the nerves can be accurately assigned to different parts of the body.
The nerves emerging from the cervical spine primarily innervate the arms, shoulders and head.
The nerves emerging from the thoracic spine are the middle part of the torso.
The nerves emerging from the lumbar and sacral regions of the spine are the lower torso and legs.
WHAT IS OSTEOCHONDROSIS?
Osteochondrosis– one of the most common diseases of the musculoskeletal system. However, this term is not generally accepted. In most foreign countries, the word “spondylosis” is used to refer to diseases of the spine - from the Greek spondylos - spine. The term “osteochondrosis” is also of Greek origin, formed from two words: osteon - bone and chon-ros - cartilage. Ending os indicates the dystrophic nature of the changes.
So, this is a disease of the cartilaginous surfaces of the bones of the musculoskeletal system, mainly the spine, as well as the hip, knee and other joints. What reasons contribute to the occurrence of diseases? Let's look at them.
Reason one. Bruises
It is generally accepted that when young children fall and hurt themselves, this does not affect their future health. Actually this is not true. Starting from birth, with improper care and bruises in the child’s body, the position of the vertebral bodies changes, that is, even then the foundations of osteochondrosis are laid. In our lives, we quite often have to fall, hitting different parts of the body, but the back gets the most. Any bruise leaves a mark on the body. At the site of the bruise, salt is always deposited on the bones. Yes, there is still a little of it and it little, if not at all, bothers the child, but over the years there is more and more salt in this place. At the same time, new places with bruises appear, and more and more salts are deposited in the body. The spine is slowly but constantly filled with salts, and with their mass they begin to put pressure on nearby nerves. In this case, the nerves are infringed, metabolism is disrupted, and the functioning of internal organs is disrupted. The body signals this with pain. Then the person begins to take medicine for the pain, but the pain does not disappear for a long time. After visiting a doctor, a person finds out that he has - OSTEOCHONDROSIS.
There are many methods with which they try to fight them. Taking medications, ointments, tinctures, therapeutic exercises, and so on affect the condition of osteochondrosis. He stubbornly refuses to leave his body. Although a person feels some relief after treatment from a doctor, after a while everything starts all over again, and in most cases the pain becomes much stronger, and the previously used remedies no longer help. You just can’t get rid of osteochondrosis using these methods. Remember how many times during the winter people had to fall, cursing road and utility services? But no one even thought about the harm caused to people's health. Over the years, falling and hurting people accumulate salts in their bodies and disrupt their metabolism. These disorders slowly but surely bring them closer to old age. First of all, a person feels his age with his back, with his spine.
Reason two. Physical inactivity
The less movement, the faster salts are deposited in the body, and often these deposits take the form of spikes. Physical exercise does not allow salts to be deposited in large quantities, but then a person becomes a hostage of this system. But if, for some reason, he stops doing gymnastics, salts continue to be deposited in the body at an even faster rate. Imagine a mountain river. The speed of such a river is very high. Water even carries stones, not just sand. It does not form beaches along the shores. Now remember the quiet and wide rivers, their smooth, majestic flow. Wide beaches form along the banks of such rivers.
It’s the same in the body: a sedentary lifestyle leads to the accumulation of salts, that is, to the worsening of osteochondrosis.
Reason three. Technical progress
And we owe this way of life to technological progress. It has led to the fact that most people spend their working time sitting at a desk or computer. They get home by various means of transport, rather than on foot. Yes, before going to bed, they sit or lie in front of the TV. They even switch TV channels while lying on the couch. There is very little movement, complete peace.
Reason four. Poor nutrition
Hearty food, high in calories, which the digestive organs have difficulty coping with. Unspent energy is conserved by the body, and the human body gains weight, accumulates salts and fat deposits, thereby further disrupting metabolism. The human body turns into a dump of various substances. Salts deposited in the spine put pressure on the nerves, which cannot cope with their functions. The body gets slagged and immediately various diseases make themselves known.
Reason five. Ecology
The food we eat changes every year. The air we breathe, the water we drink. Even the clothes we wear leave much to be desired. Food and water not only contain toxic chemicals and harmful components, but are often radioactively contaminated. The air is polluted with industrial waste, gasoline vapors, and fumes from environmentally harmful building materials. How can our body cope with this? People living in environmentally friendly places and eating organic foods are less likely to develop a disease such as osteochondrosis.
Reason six. Negative emotions
In our progressive age, the age of high speeds, it is very difficult for our nervous system. Stress at work, at home, lack of confidence in the future, economic crises, large information load from television, unemployment and so on - all this contributes to the fact that the nervous system malfunctions. As a result, metabolism is disrupted. Our body tries to “fence itself” and puts up protection from various accumulations, including salts.
Reason seven. Weight lifting and vibration
When lifting heavy weights, the disc or spinal bodies most often become displaced. The balance of the entire spinal column is disrupted. The body, trying to restore it, deposits salts. Vibration affecting a person also contributes to the displacement of discs and vertebral bodies and leads to the deposition of salts.
Reason eight. Hypothermia
Most people neglect it and this contributes to the exacerbation of diseases such as lumbago (lumbago), radiculitis, and neuralgia. Most often, the disease would not manifest itself if it were not preceded by hypothermia. But it is easier for a person to deal with this reason than with others, since he is able to take care of himself and take measures to prevent hypothermia.
Why did osteochondrosis become a disease of the 20th century?
Didn't people hurt themselves before, didn't lift heavy things, didn't eat wrong, weren't hypothermic, and so on? It’s just that now all the reasons and prerequisites have come together, and osteochondrosis has taken one of the first places among diseases. Having analyzed the information collected over the years of practice, we can conclude that a huge number of diseases could have been avoided, since they are a consequence of osteochondrosis.
Osteochondrosis and the nervous system
Osteochondrosis conquers space quite slowly, especially in the initial stages. Where are salts deposited in the initial stages? In which departments? Where there is the least movement. The calmest part of the spine is the thoracic spine. The work of the heart, liver, stomach, diaphragm, and pancreas depends on this department. If the nerves of this department are pinched, then signals from the brain will arrive late or weakened. Organs, systematically receiving incorrect information, begin to change, which leads to violations. Gradually, these disorders lead to organ disease.
In what cases does nerve entrapment occur?
This could be a displacement of the vertebral bodies, a strangulation by a hernia, but most often it is a strangulation of the nerves by deposited salts. The salts slowly put pressure on the nerves, and the pressure intensifies every day. It becomes increasingly difficult for nerves squeezed in a “vice” to perform the function of the spine.
How can you restore normal functioning of the nervous system?
To do this, it is necessary to remove salts deposited in different parts of the spine. By removing salts from the thoracic region, you can restore the functioning of the nerves, which in turn will restore the functioning of the heart, liver, stomach, and so on. There will no longer be distorted information, there will be no delay in its “path”, but most often these reasons cause disruption in the functioning of internal organs.
Osteochondrosis – the beginning of a heart attack?
If we analyze the background of heart attacks, they mainly occur after the patient is very nervous. With nervous excitement, blood pressure rises. To normalize it, a signal is sent from the brain to dilate blood vessels. Such a signal arrives through the nerves, but if they are pinched by the spinal disc or heavily compressed by salt deposits, then the signal arrives late or is greatly weakened, as discussed above. The vessels of the heart, unable to withstand strong pressure, are injured and the blood, developing, forms a hematoma. What is a hematoma in the heart muscle? This is a disorder of the heart. This is what a signal delay in the “path” can lead to. Strokes follow the same pattern, only in this case the nerves depart from the cervical spine, and a hematoma in the cerebral cortex leads to complete or partial paralysis of the human body. So, a simplified scheme for the formation of strokes and heart attacks was considered. Is it possible to determine how strongly osteochondrosis has taken its position? Yes, we will look at this issue in the next section.
Diagnosis of diseases
By carefully studying this section, you can independently find out which of the body organs will be impaired, that is, what diseases a person can expect in the future.
Do you have correct posture?
Let's examine the spine from top to bottom by looking at ourselves in the mirror. To correctly determine, you need to stand near a flat wall without shoes. Then your body should touch it at five points: the back of your head, shoulders, buttocks, calves and heels. If you feel comfortable in this position, you have correct posture (Fig. 2)!

Figure 2
Correct posture
However, this is now quite rare. Most often, the posture of most people is incorrect: the head is directed forward, the shoulders are rounded and located at different levels, the back is bent, and so on. Let's start looking at the spine.
Cervical region
Normally, there should be a small depression running along the neck, the spinous processes of the spine should not be visible, that is, they should not lift the skin. When palpated (feeling), the spinous processes should be separated from each other and all, except the seventh cervical process, should be approximately the same size and at the same distance from each other. The seventh cervical spinous process should be slightly larger and clearly visible (Fig. 3).

Figure 3
Location of the spinous processes
If there is no depression in the neck, and the spinous processes do not correspond to the required dimensions and are not in the same row, but are somewhat displaced, or all the processes have merged into a single “column,” then this already indicates a deviation from the norm. This means that a person has or may in the future have the following diseases: hypertension, headaches, throat diseases, thyroid diseases, decreased hearing, vision problems, as well as various hand diseases, insomnia, and so on.
High blood pressure and headaches indicate that the likelihood of a stroke is very high. Any stress with such a diagnosis can lead to serious illness. Stroke is a disease that turns a person into a “living corpse.” He exhausts himself, exhausts his family and friends, and with a healthy heart and good care, he can be sick for years, but all this can be avoided. Usually, salt deposits, accumulating gradually, form the so-called “withers”, which grows faster every year. Many people think that these are fatty deposits and they have little effect on their health, but this is not so. Salts are initially deposited in this place, and then fatty deposits. The larger the size of the withers, the greater the likelihood of stroke, hypertensive crises and other diseases discussed above. Most often, such salt deposits form in people who are engaged in long hours of “sedentary” work and study. Very often they occur in athletes after an injury, as well as in people after accidents, bruises and falls. Treatment with bone energy massage helps to free the spine from salts and resolve the “withers”, which many women hide under their hair. With this treatment, not only physiological changes occur, but also cosmetic ones, that is, not only health is restored, but also beauty.
Thoracic region
It consists of twelve vertebrae. The spinous processes must be the same size, not merged into one “column,” occupy the correct position in the row and be in a recess. It is ideal that even when tilted, the spinous processes remain in the hollow and do not stand out on the surface of the skin. Then, even if you fall on your back, the long back muscles will not allow a spinal bruise to occur. But most often, the spinous processes of the thoracic spine are clearly visible, have an irregular shape, position in a row, are increased in size and often merge into a single “column”. Most people have a curvature of the spine acquired over the years of life (sedentary work, study, heavy lifting, accidents, vibrations). From this we can conclude that almost everyone, to a greater or lesser extent, has a disease such as osteochondrosis, which increases over the years, despite attempts to combat it with diet and exercise.
Patients with osteochondrosis in the cervical and thoracic regions suffer from colds, often turning into chronic diseases, leading to asthma. Bronchitis, pneumonia (pneumonia), pleurisy, and so on disappear after three courses of bone-energy massage, practically without taking medications. Of course, everyone is so accustomed to believing in the power of drugs that they do not allow faith in other means. But medications only make the disease chronic. Under the influence of bone energy massage, the lungs are freed from mucus and fluid that have accumulated in them. At the same time, the cough intensifies, and the infection that caused the disease is removed with sputum. Then gas exchange in the lungs is restored, the cough gradually disappears, and health improves. The patient feels better than before the illness.
The vertebrae of the thoracic region affect the condition of the hands. And when they hurt, everyone begins to feel disabled. With osteochondrosis, your hands sometimes hurt so much that you can’t even lift a cup of tea. The strength in the hands disappears, they bother you with aching pain at night, they become numb, “humming” and you have to look for a comfortable position for them. And this pain does not disappear from taking medications. And osteochondrosis is again to blame for all this. Once salts are deposited in the lower cervical and upper thoracic spine, they begin to be deposited in the joints of the upper limbs. After infectious diseases, complications often occur and the joints become inflamed, which leads to arthritis, arthrosis and polyarthritis. After treatment with bone-energy massage, the salts disappear first in the spine and only secondarily in the joints. Then joint pain disappears, the joint itself acquires the correct shape, and movement in it is restored. Normal life has been returned to the hands and there is no longer a feeling of inferiority, no more illness.
If salts are deposited in the thoracic region from the second to the sixth vertebrae, then the likelihood of heart disease is very high and quite often this leads to a heart attack or other heart diseases, such as angina pectoris, ischemia, tachycardia, arrhythmia. After treatment, heart function is restored, heart diseases gradually disappear and the likelihood of a heart attack is almost zero.
I would like to note the following pattern of the influence of posture on the condition of the heart muscle. Over the years, a person stoops more and more, they even say that “the years have bent him.” And the more stooped, the worse the condition of the nerves, especially in the thoracic region, and this is primarily associated with the heart. Look at your posture, do you have a big stoop, can you straighten your shoulders? Or have the salts bound you so tightly that you can’t even move back, they won’t let you? By this sign you can unmistakably find out what condition your heart is in. Almost all stooped people suffer from heart disease. The more stooped, the more severe the disease.
The thoracic vertebrae located below innervate the liver, pancreas, stomach, spleen, adrenal glands, and so on. To find out what condition other organs are in, you need to look at the spinous processes of the lower part of the thoracic spine. If they have changes in position, increase in size or differ in size, then a diagnosis can be confidently made. Bone-energy massage restores the functioning of the nervous system and internal organs, relieves heartburn that has been tormenting for years, gastritis, cholecystitis, heals stomach and duodenal ulcers. The scheme of the treatment process is as follows: as soon as the pinched nerves are freed from salts, the pathological changes disappear and the functioning of the organs is restored. Having a normal, healthy spine, you can avoid a large number of diseases that ruin your life. Unfortunately, an ideal spine is quite rare. You can see it in Tarzan by watching a film about him. Even when tilted, the spinous processes of this movie character remain in the hollow and, looking at his spine, we can say that he is healthy.
Lumbar
It is one of the most mobile in the spine and consists of five vertebrae. When salts are deposited in this section, fat deposits are also deposited. Visually this is clearly visible. Fat deposits are deposited on the sides of the waist, and the waist line “creeps” upward, reaching the 10-11 spinous processes of the thoracic spine. This is clear evidence of osteochondrosis. Salt deposited in the lumbar region makes it difficult to move when bending, turning, walking, and in addition causes diseases of the intestines, kidneys, and genital organs. Almost all patients have constipation, sore legs, prostatitis in men and diseases of the genital organs in women, as well as fatigue. In the morning, getting out of bed, they feel pain in the lumbar region, their lower back hurts, and at night, their legs hurt. When such people wake up in the morning, they do not feel rested. The most common diseases in the spinal region are disc herniation and Schmorl's hernia. A disease such as a herniated disc can be distinguished visually. The posture of a person with a herniated disc is greatly altered. It resembles the “spoon in a glass of water” position, that is, there is a sharp change in the direction of the upper and lower parts of the body. A Schmorl's hernia does not have such clear signs, but it can be seen on an image of the spine. Most often, surgeons recommend surgery because they cannot treat otherwise. Treatment with bone-energy massage will relieve hernias of any kind without surgery and in a short time. As soon as the salts leave the spine, the massage therapist will “put” the disc in place. The case of Schmorl's hernia is more difficult, since the bulging membrane is soft and it is more difficult to reduce it. But even in this case, it is delayed, since the pressure inside the body is lower than atmospheric pressure.
What are the dangers of having a hernia in the lumbar region? If it is pinched, paralysis of the legs may occur. The presence of osteochondrosis in the lumbar region leads to neoplasms that later degenerate into cancer. So osteochondrosis in the lumbar region is not so offensive.
Sacrum and coccyx
They are very important in our lives, although few people pay attention to them. The spinous processes of the spine should smoothly transition from the lumbar region to the sacrum and coccyx. There should be no raised areas or fat deposits in these areas. If raised areas, fatty deposits or “dimples” are noticeable in them, then the spine in this section already has accumulated salts from falls and bruises. Sometimes the changes in the sacrum are such that you can even place a glass on the deposits and it will not fall. As many believe, “pretty dimples” are a sign of long-deposited salts. The dividing line of the gluteal muscles should be smooth and thin, without curvature. If there is a curvature, then salt has been deposited on one side of the tailbone more than on the other, this is due to a bruise on one side. Osteochondrosis of the sacrum and coccyx leads to diseases such as varicose veins in the legs, hemorrhoids, constipation, coxarthrosis, arthrosis of the knee joint and even rectal cancer. This is how many diseases osteochondrosis can cause.
So, by examining the spine, you can independently determine the presence of diseases in your body. The stronger the deviation from the norm, the more developed this or that disease has become.
Don’t wait for diseases to manifest; start treating your spine if deviations from the norm are already detected. And you will get rid of a whole complex of diseases that are a consequence of osteochondrosis.
What should not be done with osteochondrosis?
1. Make sharp turns to the right and left with a heavy weight in your hands, shoulders or back with an axial load on the spinal column.
2. Stay in the same position for a long time when the body is tilted forward, since this almost doubles the load on the intervertebral discs.
3. While sitting, you should not strain your back muscles. It is best to lean on the back of the chair, which should be higher than your shoulder girdle, and the seat should be hard and level. Its height should be equal to the length of the legs (if the feet do not reach the floor, a bench should be placed under the feet), the depth should be at least 1/5 of the length of the hips. The height of the desktop should correspond to the height, that is, the lid should be at the level of the elbow of a bent arm, and there should be room under the table for outstretched legs. While sitting, you need to change the position of your legs - bend and straighten them.
4. It is not recommended to cross your legs while sitting, as this unevenly distributes the load on the sacroiliac joint and spine, and also disrupts blood and lymph circulation, which leads to numbness and swelling of the legs. You can cross your legs only when they are extended, in the area of the ankle joints.
What mistakes do people who have already been diagnosed with spinal diseases make?
First mistake
People are designed in such a way that they turn to doctors when their pain is already severe.
There is no need to wait for it to go away on its own. You will then lose a lot more time and money in order to treat it. Your disease will already be advanced. As soon as the inflammatory process begins, there is a stabbing or pain somewhere, you need to consult a doctor. An examination needs to be carried out. We need to find the cause of this pain and only then begin treatment. No self-medication, no psychics, no advice from neighbors! Only specialists!
Our systems are not for neglected patients, but for generally healthy people. Those who sit a lot at the computer, watching TV, or driving. They lead a sedentary lifestyle, and nothing hurts yet. But this is temporary! By practicing according to our system, you can prevent diseases. They are quite lightweight and do not require any equipment. You will be prepared for illness. I often say: forewarned is forearmed.
Second mistake
Another serious mistake is when people, after undergoing treatment or surgery for a hernia, stop and stop moving completely. Yes, the first three months after the operation you need to undergo rehabilitation and monitor your body very carefully. But then you need to do special exercises. Otherwise, a second and third hernia will appear! The fact is that hernias do not disappear completely; they cannot be cured. During the disease, the distance of the intervertebral discs decreases due to muscle atrophy. The muscles do not support the spine, and they begin to sit down, so you need to do exercises regularly. If you don’t do this, you will notice a hernia in another place - higher or lower than the previous one. But she will definitely appear!
Third mistake
The patient often asks: how do I get a hernia if I don’t carry heavy objects, don’t strain, and am always at rest? This is why a hernia occurs! There is a traumatic hernia, there are hernias when there is an overload, and the muscles are not prepared. And hernias also occur when a person sits in a relaxed state for a long time - this is the greatest load on the intervertebral disc. When the muscles are relaxed, the height of the intervertebral discs decreases.
Nutrition and spine
Nutrition plays a very important role in a healthy back. Vitamins, calcium, and minerals are needed.
The more weight a person has, the more difficult it is for him to move and live, the more stress the intervertebral discs and joints receive. But it’s not diets that are needed! And proper, competent and healthy nutrition!
But you need to be able to control yourself and eat in moderation. You don’t need to eat once or twice, but a lot, or better yet, five or six times little by little. And you should eat your last meal three hours before bedtime.
So, of the main nutrients for the spine, proteins and fats are important.
Sources of animal protein: eggs, milk, fish. High-quality vegetable protein is found in the following products: seeds, beans, nuts, corn, buckwheat.
Modern man eats a lot of fats, but, unfortunately, these fats are of poor quality, they worsen the condition of the spine and the body as a whole. High-quality fatty acids can be obtained from the following products: walnuts (walnut oil), flaxseed oil, hemp oil, fatty sea fish. The most important minerals for the spine are: calcium, phosphorus, magnesium and manganese. The source of calcium for the body is: hard cheese, liver, nuts, cottage cheese, fresh eggs, cabbage. Phosphorus is found in bran, peas, natural cheeses and fish. Enough magnesium is found in sunflower seeds, raw spinach, and cucumbers. Manganese enters the body through seaweed, bananas, onions, potatoes, and animal kidneys.
From simple to complex
Most patients who want to get rid of back pain begin exercising immediately. And some of them are surprised: “Such easy exercises?” Many people ask permission to move straight to more complex exercises. But this is absolutely forbidden! The exercise system suggests that you need to start with the basics. The muscles and the body as a whole must be prepared for correction. It is extremely important to strictly maintain the selected system, starting the course with a gentle regimen (no matter how well you are physically prepared), through the intermediate stage and only then proceeding to a complex block of exercises!
Until you have mastered simple exercises, you cannot move on to more complex ones. If you feel that performing some exercise is easy for you, you need to additionally load the muscles, that is, start doing the same exercises, but with an additional load: rubber band, dumbbells.
Only after you begin to perform the exercises of the first cycle very easily (with full amplitude and with additional load!) can you move on to the next stage. Listen to your feelings, consult your doctor and don’t rush. There are no specific periods of work in one of the modes and there cannot be - everything is strictly individual. For example, we can say: most often, children are given from six months to a year to fully master the gentle regime, and only then are they carefully transferred to a more complex program.
The most important thing in classes is consistency. You need to exercise three times a week. Only following these rules will allow a person to help his spine.
Self-control
On some days the exercises may be easy to perform, but on others the same movements will be difficult for you. Especially with a load - a dumbbell, disks or rubber band. There is no need to panic, just reduce the load so that the exercises are performed not with force, but with moderate severity. The reasons for sudden weakening can be very different: weather changes, poor mood, weakness after illness, and so on. Under no circumstances should you perform exercises if you have any diseases - respiratory (especially at high temperatures), dizziness and weakness. First, take measures for the child’s complete recovery and only then begin to work gradually. Gradually! No three sets of eight repetitions! You need to start with one approach and again with the first system. Don't worry - you'll quickly catch up and reach the next level of difficulty much faster than when you started. There will be no need to devote months or half a year to the first gentle regime system.
Always monitor how your body reacts to exercise. The optimal load for each person is individual. They depend on the condition of both the ligamentous and muscular systems, as well as the cardiovascular system. Constant self-control is necessary. In a special diary you should record your condition after classes: sleep, feeling tired, appetite, performance, pulse before and after classes. Self-control indicators can be divided into two groups: subjective and objective. Subjective ones are sleep, appetite, muscle discomfort. You need to listen carefully to yourself. Objective indicators are heart rate and blood pressure. Normally, at rest, the heart rate is 70–75 beats per minute. Any physical activity, even a small one, causes an increase in this indicator. In this way, the heart tries to deliver more blood to the working muscles, and with it oxygen and nutrients. An increase in heart rate to 140 beats per minute is considered acceptable. If the heart beats faster, the load needs to be reduced. In a healthy person, the pulse after physical activity returns to its original values after 10 minutes. Slow heart rate recovery indicates excessive stress. In this case, the loads also need to be reduced.
The blood pressure value is expressed in two numbers. For example, 120 to 70. The larger value is systolic pressure. The smaller one is diastolic. During physical activity, systolic pressure initially increases, then stabilizes at a certain level. Diastolic pressure may not change during moderate exercise and increases only during intense exercise (by 10 mm Hg). Symptoms of increased blood pressure are headache, tinnitus, heaviness in the back of the head, and spots in the eyes. When these symptoms appear, as well as when the pressure rises above 150 mm Hg. Art. the lesson must be interrupted, and then the intensity must be reduced.
Enter all subjective and objective readings in the diary, and in the last line put your assessment of the effectiveness of the classes - how your well-being and condition have changed.
Rules for performing exercises
1. Exercises cannot be swapped - perform them in the strictly specified order.
2. You cannot perform more repetitions than indicated. If you feel that some exercise is easy for you, then you need to additionally load the muscles, that is, start doing those exercises, but with additional load.
3. Weight and counterweight should be performed depending on how you feel. It is very important to accustom your body to stress gradually; in no case overload yourself. To begin, choose a weight with which you can easily perform the exercises.
4. Listen to your feelings, consult a doctor and take your time. There are no specific periods of work in one of the modes and there cannot be - everything is strictly individual.
5. Do the exercises constantly. Do not take long breaks: exercise three times a week, every other day or two.
Sets and reps
1. Each exercise has a certain number of approaches and repetitions. If it is written that you need to do 3 sets of 8 repetitions, this means that this exercise must be repeated 8 times, then rest for 2-3 minutes, and repeat the same exercise 8 times. And again rest for 2-3 minutes, and again perform the exercise 8 times. You will get 3 sets of 8 repetitions.
2. If it is difficult for you to perform the required number of approaches, then to begin with you can do only 1 approach, but exactly the number of repetitions indicated in the program. Thus, the exercises must be performed until it becomes easy.
3. Exercises cannot be summed up. Many patients, having inattentively read the rules for performing exercises, without understanding what an approach and a repetition are, begin to perform exercises in a row without rest, or resting, but when it is convenient for them. It is not right! You need to rest for exactly 2–3 minutes to restore breathing, pulse, and blood flow to the muscles.
Movements
1. It is necessary to perform movements with full amplitude, as stated in the condition. Listen to your body - perform exercises using the muscles you are working on. Ask your loved ones to watch you from the side. They should make sure that you do the exercises exactly as indicated in the book.
2. The speed of movement should be the same, both during relaxation and tension. Do not perform exercises at a fast pace. Movements should be slow and smooth.
3. You cannot perform exercises sharply or jerkily.
Lying and hanging exercises
1. You should not hang on the bar if you have acute pain. The spine may be further injured.
2. At the initial stage, some exercises are done lying down, then on a board at a certain slope, gradually increasing the angle until it is transferred to a vertical position. You can adjust the angle of the board using either a wall bars or a regular chair. He is placed with his back to the wall, and a board is installed on it - first on the seat, then on the back.
3. You can make exercises on the wall bars easier with the help of special loops with hooks (sold in stores): the loops are put on your hands, and the hooks cling to the bar.
4. When performing hanging, you cannot jump or jump onto the bar. Slowly put the weight on your legs and step down, and also slowly put the weight on your arms and hang.
If it's very easy
If the exercises are very easy for you, you should not increase the number of repetitions. You need to increase the load with additional equipment: rubber bandages, dumbbells, weights. When performing the exercise, you should feel the load all the time.
If it's very difficult
1. If the exercises are difficult, it is enough to perform only 1 approach.
2. When performing lying down, when movements of the body on some plane (sliding) are difficult, you cannot raise the body. Lay down double cellophane to ensure slipping.
IF YOUR NECK HURTS
The systems are created for people who already have dizziness, headaches, pain in the shoulder, arm, numbness of the fingers, and circulatory problems. I gave a system to create a muscle corset for decompression - to increase the height of the intervertebral discs. All exercises must be performed smoothly, slowly, without overpowering the pain. That is, until the pain touches. The first exercises you see are done lying down. You cannot perform 3 approaches at once. Repetitions must be performed in the quantity that we need. And all exercises must be performed in one approach. And for a month, two or three, until you feel that the exercises are easy and do not cause pain. And then you can move on to 2 approaches, and then 3. Be sure to control yourself - keep a diary. Write down your blood pressure, pulse, and breathing. I will constantly remind you about breathing. Breathing should be done calmly. Do not hyperventilate, that is, deep breathing. In a relaxed state, inhale and when tense, exhale. Then you won't be suffocated. You cannot swap exercises. Perform them in the order indicated.
What do we need?
To complicate the exercise, we need to sew a loop (the sketch of the loop is shown in the photo). The upper part of the loop - the holder - can be an ordinary hanger. You also need a rubber band for this exercise. When you perform exercises while lying on the mat, you need to secure a rubber bandage to the leg of a table or cabinet that is located opposite your head. And thus the tension of your bandage is obtained individually for each person. Exercises should be performed comfortably. If the exercises are very easy, we must make it more difficult. We tighten the bandage tighter or use 2-3 bandages - then it will be more difficult to perform this movement. The load must constantly increase.


You can't do it every day. Three times a week. It's enough.


We will also need the machine shown in the photo. Its likeness can be made at home (look at the photos). This machine is very easy to make. It hangs on any door, and you can immediately work with it. We will need: any door, a mop, hinges, a hanger. And also a five-liter bottle of water, which will act as a load.

This exercise can be performed without a counterweight. A loop is put on, hung on a hanger, and we tie a rubber bandage to this fastener. The hanger is tied at any height - about one and a half meters from the head. A load of 2-4 bandages depends on your capabilities.
The number of approaches indicated is performed.
Attention! We must remember that all disorders in the functioning of the spine take decades to form, and do not think that in a month or two you will be cured and everything will be fine. This treatment must be carried out for a long time. Even when the pain decreases, the treatment does not end. This is exercise for life.
Exercises for the cervical spine (lying down)
Exercise 1
I. p.: lying on your back, wearing a noose and a rubber bandage. We hold on with our hands so that we are not pulled upward. The bandage is stretched enough to stretch the head.

Slowly raise your head, keep your neck straight, then make a movement as if you are trying to touch your chest with your chin. We perform the exercise very smoothly, without sudden movements. And we also smoothly return to the starting position. First, return the chin to its original position, and then lower the head.

Let's watch our breathing.
We count the repetitions. We perform 3 sets of 8 repetitions. With breaks of 2-3 minutes of rest between them.
Exercise 2
I. p.: lying on a hard surface - on the floor, couch or bed. The loop is put on and the rubber band is secured to the leg of the table, cabinet or bed.
We make a smooth tilt of the head to the right side, hold for 2-3 seconds and return to the starting position. And turn our head to the left.
Let's watch our breathing. Let's not detain him. In the starting position - inhale, reaching the moment of highest tension - exhale.

We count the repetitions.
Exercise 3
I. p.: lying on your back, with a loop on and a stretched rubber bandage, which is hooked onto the leg of a table, cabinet or bed.

We make a smooth turn to the right and then move our chin, as if we want to reach our shoulder. We hold for 2-3 seconds and just as smoothly return to the starting position. Inhale and turn your head to the left. We try to touch the left shoulder with our chin and just as smoothly return to the starting position.
Let's watch our breathing. Let's not detain him. In the starting position - inhale, reaching the moment of highest tension - exhale.
We count the repetitions. We perform 8 repetitions to the right and left - this is 1 approach. You need to do 3 approaches. With breaks of 2-3 minutes of rest between them.
Exercise 4
I. p.: We lie on our stomachs, our arms are extended along the body, a rubber bandage is attached to the leg of a cabinet, table or bedside table.

We lift our head off the floor and smoothly lift it up. We hold for 2-3 seconds and then smoothly return to the starting position - first return it to the floor, then relax.

Let's watch our breathing. Let's not detain him. In the starting position - inhale, reaching the moment of highest tension - exhale.
We count the repetitions. We perform 3 sets of 8 repetitions. With breaks of 2-3 minutes of rest between approaches.
AGAINST LOWER PAIN
Exercises for the thoracic and lumbar region (gentle mode)
This set of exercises is intended for older people, children, and those who do not play sports.
The gentle regimen must be performed for a long time until it becomes very easy to perform and no longer causes discomfort or pain. Then we complicate the exercise with the help of simple devices. We need to achieve an increase in the height of the intervertebral discs. This requires rubber bandages and leg loops. You need to tighten the bandage until it causes pain. That is, if it is easy and comfortable for you to perform one bandage on your leg with tension. Your bandage should be tied at a distance of 1.5-2 meters so that the bandage pulls on your legs. If the exercise is easy to perform, then you can use a double and triple bandage. And also tighten the single one less or more.
Then special devices are installed. We need a board - any board, an old door or a countertop. You can cover it with leatherette, placing foam rubber inside. There is a loop attached to the board. The angle of the board should be small at first. Then gradually increase it to 45 degrees. The board can be rested on a wall bars, bedside table, or chair. Depends on what height is needed. At one height you work for a week or two or three, until you feel that the exercise is easy and you do not feel pain. Until you reach a vertical position.
Exercise 1
I. p.: lying on your back, arms out to the side, palms down.
Without lifting your shoulders and the back of your head from the floor, slowly turn your left thigh as far to the right as possible. The left leg is lifted off the floor. We stay in this position for 2-3 seconds and just as slowly return to the starting position. Then slowly turn the right thigh as far as possible to the left. The left leg is lifted off the floor. We hold this position for 2-3 seconds and slowly return to the starting position.

Counting repetitions: to the right 8 repetitions and to the left - 8 repetitions. This will be 1 approach. Thus we perform 3 approaches. Between each approach we rest for 2-3 minutes to restore our breathing.
Pay close attention to your breathing! He cannot be detained. In the starting position – inhale. At the moment of highest tension, exhale.
Exercise 2
I. p.: lying on your back, legs apart, feet at shoulder level. Arms crossed over chest, palms clasping forearms.
Inhale and smoothly turn your body as far as possible to the right, lifting your left shoulder off the floor. In this case, the pelvis and legs remain motionless. We remain in this position for 2–3 seconds and return to the starting position. Then we inhale and, as we exhale, turn the body as far as possible to the left, lifting the right shoulder off the floor, while the pelvis and legs remain motionless. We stay in this position for 2-3 seconds and return to the starting position.

Counting repetitions: 8 repetitions in one direction, 8 in the other. This will be 1 approach. You need to do 3 approaches, resting 2-3 minutes between them to restore your breathing.
Watch your breathing!
Exercise 3
I. p.: lying on your back, legs together, toes pointing towards you, arms slightly spread to the side, palms down.

Without lifting your shoulders and the back of your head from the floor, move both legs to the left, sliding along the floor. We try not to exert any effort on the muscles of the left side. We hold this position for 2-3 seconds and just as slowly return to the starting position. We inhale and move both legs to the right, sliding them along the floor, trying to make efforts with the muscles of the right leg. We hold this position for 2-3 seconds and also slowly return to the starting position.

Counting repetitions: 8 repetitions in one direction and 8 repetitions in the other direction. This is 1 approach. You need to do 3 approaches, resting 2-3 minutes between them to restore your breathing.
Watch your breathing! Let's not detain him. In the starting position, inhale, at the moment of highest tension – exhale.
Note! Make sure that your feet do not leave the couch or carpet during the exercise. To make your feet glide more easily on the floor, you can put plastic bags on them. When you feel the exercise is easy, remove the bags to provide resistance.
Exercise 4
I. p.: lying on your back, legs apart, feet level with your shoulders, arms crossed on your chest, palms covering your forearms.

Without lifting the body from the floor, with a sliding movement we make a maximum tilt of the body to the left. The pelvis and legs remain motionless. We stay in one position for 2-3 seconds and just as slowly return to the starting position. Then we inhale and as we exhale, with a sliding movement we make a maximum tilt of the body to the right. At the same time, the legs also remain motionless. After holding for 2-3 seconds, we return to the starting position and inhale.
We count the repetitions. We perform 8 turns in one direction, 8 in the other. This will be 1 approach. You need to do 3 approaches. Rest 2-3 minutes between them.
Let's watch our breathing.
Note! If exercises are difficult for you, you can put oilcloths under your body.
Exercise 5
I. p.: We stand straight with a straight back, looking ahead.

We count the repetitions.
Watch your breathing!
Exercise 6
I. p.: lying on your stomach, arms extended along the body, palms up, chin touching the floor. The legs are secured with weights or a loop to a nightstand, closet, or any other convenient item in the house.

We lift our body high off the floor and at the same time raise our arms, palms up. We look straight ahead. We freeze for 2-3 seconds and return to the starting position.
We count the repetitions. 8 repetitions - this will be 1 approach. You need to perform 3 approaches, resting 2-3 minutes between them.
Watch your breathing! He cannot be detained. In the starting position – inhale. At the moment of highest tension, exhale.
Note! If this position is difficult, then you can first slightly lift your chest from the floor or couch, tense and relax the muscles. Then we increase the amplitude of movement. If the movement is performed easily, then the hands should be moved forward, making this exercise more difficult.
Exercise 7
I. p.: lying on your stomach, arms extended along the body, palms up, chin touching the floor.
Slowly raise your legs and at the same time lift your body off the floor to its maximum height. We look straight ahead. We hold this position for 2-3 seconds and slowly return to the starting position.

Counting repetitions:
Watch your breathing! He cannot be detained. In the starting position – inhale. At the moment of highest tension, exhale.
Exercise 8
I. p.: lying on your left side, your left arm is extended in front of you, palms down. The right one is extended upward over the head and touches the floor with the palm.

We try to bring our right arm and right leg straight as close to each other as possible. The head is slightly raised, looking ahead. We remain in this position for 2-3 seconds and slowly return to the starting position.

Counting repetitions: 8 repetitions is 1 approach. You need to do 3 approaches, resting 2-3 minutes between each approach.
Watch your breathing! Let's not detain him. In the starting position – inhale, at the moment of highest tension – exhale.
Exercise 9
I. p.: lying on your right side, your right arm is extended in front of you, palms down. The left one is extended up over the head and touches the floor with the palm.

Slowly raise the straight left leg and try to bring the arm as close to each other as possible. Raise your head, look ahead, stay in this position for 2-3 seconds and slowly lower your arm and leg to the starting position.

We count the repetitions. We perform 8 repetitions. This will be 1 approach. We do 3 approaches, between which we rest for 2-3 minutes to restore breathing.
Watch your breathing! In the starting position, inhale, at the moment of highest tension – exhale.
Exercise 10
I. p.: Lying on a hard surface - on the floor, couch, bed, arms along the body.
We bend our legs, slowly pulling our knees and heels towards our buttocks. We try to pull it as close as possible - slowly, smoothly. And slowly return to the starting position.

Let's watch our breathing. Let's not detain him. In the starting position – inhale. At the moment of highest tension, exhale.
Number of repetitions.
Exercise 11
I. p.: lying on a hard surface - on the floor, couch or bed, hands behind your head, knees bent and your entire foot resting on the floor.
We make an attempt, without lifting our feet from the floor, to tear our head and shoulders off the floor, pulling them forward. We tense our muscles, hold in this position for 2-3 seconds and slowly return to the starting position.

Let's watch our breathing. Let's not detain him. In the starting position - inhale, reaching the moment of highest tension - exhale.
We count the repetitions. We perform 3 sets of 12 repetitions. With breaks of 2-3 minutes of rest between approaches.
Exercises for the lumbar region (with additional equipment)
The same exercises, but with retraction, that is, with traction, to increase the height of the intervertebral discs. This requires rubber bandages and leg loops. The bandages are tightened so that the tension does not cause pain. That is, if it is easy and comfortable for you to perform exercises with one bandage on your leg (as in the photo). Your bandage should be tied at a distance of 1.5-2 meters so that the bandage pulls on your legs. If the exercise is easy to perform, then you can use a double and triple bandage. And also tighten the single one less or more.

Important! For this exercise we will need to make loops that will be attached to the legs and arms, as well as rubber bandages. Look carefully at the photographs to see how the loops are attached and how the exercises are performed.
Also, when we need dumbbells and a barbell, they can be replaced with elastic bandages, expanders, and water bottles.
Exercise 1
I. p.: lying on your back, legs apart, feet at shoulder level. Loops are attached to the legs, thanks to which they remain motionless.

Without lifting your shoulders and the back of your head from the floor, slowly turn your left thigh as far to the right as possible. We stay in this position for 2-3 seconds and just as slowly return to the starting position. Then slowly turn the right thigh as far as possible to the left. We hold this position for 2-3 seconds and slowly return to the starting position.

Counting repetitions: 8 one way, 8 the other. This will be 1 approach. You need to perform 3 approaches, resting 2-3 minutes between them.
Watch your breathing! He cannot be detained. In the starting position – inhale. At the moment of highest tension, exhale.
Exercise 2
I. p.: lying on your back, legs apart, feet at shoulder level. The arms are crossed on the chest and also secured with rubber bandages. Loops are attached to the legs to help keep the legs motionless.

We inhale and, as we exhale, make a smooth turn of the body as far as possible to the right, lifting the left shoulder off the floor. In this case, the pelvis remains motionless. We remain in this position for 2–3 seconds, then return to the starting position. Then we make a smooth turn of the body to the left, tearing off the right shoulder. We remain in this position for 2–3 seconds, then return to the starting position.

Counting repetitions: 8 - one way, 8 - the other. This will be 1 approach. You need to perform 3 approaches, resting 2-3 minutes between them.
Watch your breathing! He cannot be detained. In the starting position – inhale. At the moment of highest tension, exhale.
Exercise 3
I. p.: lying on your back, legs together, toes pointing towards you, arms slightly spread to the side, palms down. There are loops attached to the legs that allow them to remain motionless. Hold the rubber bandages with your hands.

Without lifting your shoulders and the back of your head from the floor, move both legs to the left, sliding along the floor. We try not to exert any effort on the muscles of the left side. We stay in this position for 2-3 seconds and just as slowly return to the starting position. We inhale and move both legs to the right, sliding them along the floor, trying to make efforts with the muscles of the right leg. Then we linger in this position for 2-3 seconds and also slowly return to the starting position.

Counting repetitions: 8 - one way, 8 - the other. This will be 1 approach. You need to perform 3 approaches, resting 2-3 minutes between them.
Exercise 4
I. p.: lying on your back, legs apart, feet shoulder-width apart, holding rubber bandages with your hands. There are loops attached to the legs that allow them to remain motionless.

Without lifting the body from the floor, with a sliding movement, while exhaling, we tilt the body to the left as much as possible. The pelvis and legs remain motionless. We stay in one position for 2-3 seconds, and just as slowly return to the starting position. Then we inhale and as we exhale, with a sliding movement we make a maximum tilt of the body to the right. At the same time, the legs also remain motionless. After holding for 2-3 seconds, we return to the starting position and inhale.

Counting repetitions: 8 - one way, 8 - the other. This will be 1 approach. You need to perform 3 approaches, resting 2-3 minutes between them.
Watch your breathing! He cannot be detained. In the starting position – inhale. At the moment of highest tension, exhale.
Exercise 5
I. p.: standing straight with a straight back, looking ahead, holding a stick in your hands.
Slowly bend over with your back straight, arms down and knees bent slightly. We hold the tilt for 2-3 seconds and slowly return to the starting position.

We count the repetitions. We do 3 sets of 8 repetitions.
Watch your breathing! He cannot be detained. In the starting position – inhale. At the moment of highest tension, exhale.
Exercise 6
I. p lying on your stomach, hands on your hips, chin touching the floor. The legs can be secured with weights or tied with a loop to a bedside table, closet or any other convenient item in the house.

We lift the body high off the floor and pull it straight. We look straight ahead. We freeze for 2-3 seconds and return to the starting position.
Counting repetitions: 8 - one way, 8 - the other. This will be 1 approach. You need to perform 3 approaches, resting 2-3 minutes between them.
Watch your breathing! He cannot be detained. In the starting position – inhale. At the moment of highest tension, exhale.
Exercise 7
I. p.: standing, we hold one end of the rubber bandage in our left hand, and stand on the other. Feet shoulder width apart. Right hand on the back of the head.
Slowly tilt the body to the right, hold for 2-3 seconds and also return to the starting position. We take the bandage in our right hand and secure the other end with our foot. Slowly tilt the body to the left, hold for 2-3 seconds and also return to the starting position.

Counting repetitions: 8 - one way, 8 - the other. This will be 1 approach. You need to perform 3 approaches, resting 2-3 minutes between them.
Watch your breathing! He cannot be detained. In the starting position – inhale. At the moment of highest tension, exhale.
Exercise 8
I. p.: lying on a chair on the right side, the body is stretched out. Both legs are secured in loops, tied to the leg of a chair (or cabinet). Arms crossed on the chest, hugging the shoulders or thrown back behind the head with palms to the back of the head.

Slowly make side bends down, then just as slowly rise up. The pelvis remains motionless. Then we turn over onto our left side and just as slowly lean down. Then we also slowly rise up, the pelvis remains motionless.

Counting repetitions:
Watch your breathing! He cannot be detained. In the starting position – inhale. At the moment of highest tension, exhale.
Exercise 9
I. p.: lying on a hard surface - on the floor, couch, bed. Hands along the body. The legs are already bent at the knees.

We count the repetitions. We perform 3 sets of 12 repetitions. With breaks of 2-3 minutes of rest between approaches.
Let's watch our breathing. Let's not detain him. In the starting position - inhale, reaching the moment of highest tension - exhale.
Exercise 10
I. p.: lying on a hard surface - on the floor, couch, bed, arms along the body, knees bent.
Slowly raise your legs from the floor, slowly raise your arms from the couch. We try to bend forward, hunch our shoulders and try to connect our knees to our chest. That is, we simultaneously raise our legs and lift our shoulders off the floor. We hold this position for 2-3 seconds and slowly return to the starting position.

Let's watch our breathing. Let's not detain him. In the starting position - inhale, reaching the moment of highest tension - exhale.
We count the repetitions. We perform 3 sets of 12 repetitions. With breaks of 2-3 minutes of rest between approaches.
Attention! If at any level you feel pain or discomfort, do not continue the exercise, but return to the starting position.
EXERCISES WITH DEVICES
Hanging exercises
You need to approach this system prepared. We learn how to do hangs. Some are overweight, others have weak arms and cannot hang as they should. And hanging exercises are necessary to stretch the distance between the intervertebral discs. Therefore, I provide a special loop that will be suspended from the crossbar. The crossbar can be any strong stick attached to the doorway. Thick fabric (such as a sheet) is rolled up. You can stitch it, and put foam rubber or an old blanket inside to make it comfortable to do the exercises. It is firmly attached to the crossbar. In the photographs you can see how it is made, how it is secured and how to perform exercises on it.

If you work out at the gym, they have the machines you see in the photos. But all this can be done at home. You can make special trestles from boards, cover them with foam rubber or an old blanket. Make a frame like this. Or put two bedside tables or a chest of drawers on which you can lean. If height does not allow, bend your knees. And I repeat - in your home you can find all the necessary equipment for training: a table, a bedside table, dumbbells, water bottles, an expander, a rubber bandage.

Exercise 1
I. p.: We hang on hinges, our feet do not touch the floor.
Slowly turn the pelvis to the left, twisting the body. The shoulder girdle and head remain motionless. We remain in this position for 2-3 seconds and slowly return back. Slowly turn the pelvis as far as possible to the right, twisting the body. The shoulder girdle and head remain motionless. The legs rotate following the pelvis. We hold this position for 2-3 seconds and slowly return to the starting position.

Counting repetitions: 8 - one way, 8 - the other. This will be 1 approach. You need to perform 3 approaches, resting 2-3 minutes between them.
Watch your breathing! He cannot be detained. In the starting position – inhale. At the moment of highest tension, exhale.
Exercise 2
I. p.: hanging on hinges.

We very smoothly move both legs to the right, the pelvis and body remain motionless. We hold for 2-3 seconds and return to the starting position. Then we move both legs to the left, and also hold for 2-3 seconds. We return to the starting position.

Counting repetitions: 8 - one way, 8 - the other. This will be 1 approach. You need to perform 3 approaches, resting 2-3 minutes between them.
Watch your breathing! He cannot be detained. In the starting position – inhale. At the moment of highest tension, exhale.
Exercise 3
I. p.: hanging on hinges.

Slowly move both legs back, simultaneously bend your back and move your head back. We hold for 2-3 seconds and slowly return to the starting position.
Counting repetitions: 8 - one way, 8 - the other. This will be 1 approach. You need to perform 3 approaches, resting 2-3 minutes between them.
Watch your breathing! He cannot be detained. In the starting position – inhale. At the moment of highest tension, exhale.
Exercise 4
I. p.: standing straight with a straight back, looking in front of you, holding a barbell in your hands.
Slowly lean forward with a straight back, lowering your arms down and bending your knees slightly. We hold the tilt for 2-3 seconds and slowly return to the starting position.

We count the repetitions. We do 3 sets of 8 repetitions.
Watch your breathing! He cannot be detained. In the starting position – inhale. At the moment of highest tension, exhale.
Exercise 5
I. p.: lying on your stomach (on a chair), hands on your belt, chin touching the floor. The legs are secured with weights or a loop to a nightstand, closet, or any other convenient item in the house.

We lift the body high off the floor. We look straight ahead. We freeze for 2-3 seconds and return to the starting position.

Counting repetitions: 8 - one way, 8 - the other. This will be 1 approach. You need to perform 3 approaches, resting 2-3 minutes between them.
Watch your breathing! He cannot be detained. In the starting position – inhale. At the moment of highest tension, exhale.
Exercise 6
I. p.: standing, hold a dumbbell in your left hand, feet shoulder-width apart, right hand on the back of your head.
Slowly tilt the body to the right, remain in maximum tension for 2-3 seconds, and also slowly return to the starting position. Then slowly, without jerking, we tilt to the left. And again we return to the starting position. Transfer the dumbbell to the other hand and repeat the bends.

Counting repetitions: 8 tilts in one direction, 8 in the other. This will be 1 approach. You need to perform 3 approaches, resting 2-3 minutes between them.
Watch your breathing! He cannot be detained. In the starting position – inhale. At the moment of highest tension, exhale.
Exercise 7
I. p.: lying on a chair on the right side, the body is stretched out. Both legs are secured in loops, tied to the leg of a chair or cabinet. Hands clasped at the back of the head.

Slowly make side bends down, then just as slowly lift up as much as possible, the pelvis remains motionless. Then we turn over onto our left side and just as slowly lean down. Then we rise up just as slowly, the pelvis remains motionless.
Counting repetitions: 8 slopes are 1 approach. You need to perform 3 approaches, resting 2-3 minutes between them.
Watch your breathing! He cannot be detained. In the starting position – inhale. At the moment of highest tension, exhale.
Exercise 8
I. p.: lying on a hard surface - on the floor, couch, bed. Hands along the body. The legs are already bent at the knees. The heels are pressed to the buttocks.

Slowly pull your knees to your chest and slowly lower your legs to the floor - to the starting position.

Let's watch our breathing.
We count the repetitions. We perform 3 sets of 12 repetitions. With breaks of 2-3 minutes of rest between approaches.
Exercise 9
I. p.: lying on a hard surface - on the floor, couch or bed, arms along the body, legs bent, slightly away from the buttocks.

Slowly lift your upper body off the floor and stretch your arms to your knees. We stay in this position for 2-3 seconds and return to the starting position.
Let's watch our breathing. Let's not detain him. In the starting position - inhale, having reached the moment of highest tension - exhale.
We count the repetitions. We perform 3 sets of 12 repetitions. With breaks of 2-3 minutes of rest between approaches.
Exercise 10
I. p.: hanging on hinges.
Slowly pull your knees towards your chest. We hold for 2-3 seconds and slowly return to the starting position.

Counting repetitions: 8 - one way, 8 - the other. This will be 1 approach. We perform 3 approaches, resting 2–3 minutes between them.
Watch your breathing! He cannot be detained. In the starting position – inhale. At the moment of highest tension, exhale.
Lower back exercises for those who are trained with a bar
These exercises use hooks, but here the exercise is performed on a bar. The body is free, you can’t hang out. Here you need to relax your back muscles so much that you feel that the spine is stretching and so that it is easy to perform the exercises.
If you can easily perform exercises hanging on your elbows, on the wall bars and on the crossbar, then you need to hang weights on your feet. The load is increased not by the number of exercises, but by weights. First half a kilo, then a kilo and so on. Men perform 7 kilograms on each leg. Just don’t give it such a load right away. Don't think this will be easy for you. You need to accustom your body gradually.
Exercise 1
I. p.:

Slowly turn the pelvis to the left, twisting the body, the shoulder girdle and head remain motionless. The legs rotate following the pelvis. We hold this position for 2-3 seconds and slowly return to the starting position. Then we slowly turn the pelvis to the right, twisting the body, the shoulder girdle and head remain motionless. The legs rotate following the pelvis. We hold this position for 2-3 seconds and slowly return to the starting position.

Counting repetitions: 8 - one way, 8 - the other. This will be 1 approach. You need to perform 3 approaches, resting 2-3 minutes between them.

Watch your breathing! He cannot be detained. In the starting position – inhale. At the moment of highest tension, exhale.
Exercise 2
I. p.: We hang on the crossbar in the doorway, our feet do not touch the floor.

We move our legs very smoothly to the right side, the pelvis and body remain motionless. We stay in this position for 2-3 seconds. We return to the starting position. Then we very smoothly move our legs to the left side, the pelvis and body remain motionless. We stay in this position for 2-3 seconds. We return to the starting position.

Counting repetitions: 8 - one way, 8 - the other. This will be 1 approach. You need to perform 3 approaches, resting 2-3 minutes between them.

Watch your breathing! He cannot be detained. In the starting position – inhale. At the moment of highest tension, exhale.
Exercise 3
I. p.: We hang on a wall bars or on a crossbar, our feet do not touch the floor.
We take both straight legs back, bend our back as much as possible and move our head back. We hold this position for 2-3 seconds and return to the starting position.

Counting repetitions: 8 - one way, 8 - the other. This will be 1 approach. You need to perform 3 approaches, resting 2-3 minutes between them.
Watch your breathing! He cannot be detained. In the starting position – inhale. At the moment of highest tension, exhale.
Exercise 4
I. p.: standing straight with a straight back, looking in front of you, holding a barbell in your hands.
Slowly bend over with your back straight, arms down and knees bent slightly. We hold the tilt for 2-3 seconds and slowly return to the starting position.

We count the repetitions. We do 3 sets of 8 repetitions.
Watch your breathing! He cannot be detained. In the starting position – inhale. At the moment of highest tension, exhale.
FROM THE PUBLISHER
Life has prepared for him a difficult path, full of dramatic events. He was orphaned early and spent his childhood in an orphanage in Lithuania. The environment for the development of his character is eternally hungry, abandoned, early-matured children and indifferent, sometimes monstrously cruel adult educators. His early years also included his passion for the circus. The circus replaced his family, but one day a tragedy happened: the aerialist Dikul fell from under the circus dome from a great height. Compression fracture of the spine, severe traumatic brain injury - wheelchair.
But it was this tragedy that prompted Dikul to study the human body. By researching special literature and training, he actually created his own recovery system. The work of muscles and the development of their strength capabilities - this is the direction in which Valentin Ivanovich worked.

Dikul went through hell, but found the strength not to despair and after several years of hard training, he not only got back on his feet, but also returned to the circus as a power juggler, in order to eventually become the best in this role, in order to receive recognition of his talent in everything world. Dikul is the only power juggler who received the honorary title “People’s Artist of Russia”, then his unique experience was recognized by the Order of “Conquerors of Fate”.
Dikul received public recognition for his many years of hard experience, achieving everything literally with sweat and blood. Dikul began sharing his discoveries on the road to recovery with his fellow sufferers while still in his hospital bed. As he gained experience and got good results, he felt it was his responsibility to help people in similar situations. His example gave hope to others.

Modern lifestyles are filled with inactive lifestyles.
The work of the majority of people is sedentary (office work at the computer), which results in problems associated with diseases of the musculoskeletal system. Often these same problems plague people who do hard work.
There are many different gymnastics known, however, Dikul’s joint gymnastics is especially popular among people who scrupulously monitor their health.
If symptoms, kyphosis, or lordosis occur, it is possible to improve your health through joint gymnastics by Valentin Dikul.
Features of Dikul gymnastics
Dikul joint gymnastics is used in the treatment of the following ailments:
- Osteochondrosis;
- Dysfunction of the spine and large joints;
- The presence of a vertebral hernia.
Systematic implementation of a set of exercises recommended by Dikul helps prevent atrophy of muscles and joints and restore the previous activity of movements. When performing these classes, it is allowed to use simulators for developing joints.

The features of gymnastics are:
- The main complex of interconnected training for joints, restoring motor activity;
- The use of stretching procedures aimed at the flexibility of the spine;
- The rhythm of the training with repetitions allows you to get rid of the crunching of the joints and spine, enhances the functioning of hormones and has a positive effect on the functioning of internal organs;
- Valentin Dikul’s many years of work allows us to get a stunning effect and return many people to a full life;
- Regular exercise leads to 100% recovery.
To get the maximum effect from the lessons performed according to the method, you must follow the following recommendations:
- Gradual division of loads on the muscular area of the spine;
- Exercises using a suspended rope ladder have an effective effect on the muscular corset;
- It is forbidden to overload at the initial stage. Loads must be increased gradually.
To achieve the effect of recovery, it is necessary to start classes knowingly setting yourself up for a long and labor-intensive journey.

Dikul’s healing method for joint gymnastics includes the following treatment methods:
- Elements of physical therapy, gymnastics and massage;
- Acupuncture procedure;
- Application of water procedures;
- Physiotherapy.
Basic exercises of Dikul joint gymnastics
Regular exercise effectively affects the muscular, lumbar, shoulder, thoracic and cervical functions of the spine.
The following main classes of joint gymnastics are distinguished:
- This workout is performed to improve the health of the back muscles. Lie on your back, turning your left hip all the way, you need to hold this position for about 3 seconds. At the same time, do not move your torso. Do the same with the right thigh;
- This action has a positive effect on the back muscles. To perform it, you need to spread your legs shoulder-width apart. Inhaling, we turn the body to the side, trying to move to the limit. After fixing the position for 2 seconds, repeat the turn to the other side;
- Lie on your back, straighten your legs and pull your toes towards you until they stop. Then we perform sliding movements to the sides without lifting the body from the floor. These exercises have a positive effect on the lateral muscles of the back;
- We take the same position, lying on the floor. You need to spread your limbs shoulder width apart without lifting them off the floor. Cross your arms over your chest, hugging yourself by the shoulders. We bend to the left and right, freezing with each movement for 3 seconds. These exercises have a good effect on the joints of the thoracic region;
- We take a standing position, bending forward, you need to try to keep your back parallel to the floor. Bend as much as possible, lower your arms down. Such exercises have a healing effect on the muscles of the entire back;
- To improve the health of the lumbar region, it is recommended to perform the following exercise: lying on your stomach, place your hands along your body, palms up. Raise your body without helping with your arms or moving your legs.
Accurate execution of these actions according to the system requires precise adherence to approaches and repetitions.
Conclusion
Valentin Dikul’s healing system is a set of exercises that have a positive effect on all the muscles of the body.
The methods are presented in overview in video and theoretical material.
Video: Joint gymnastics by Valentin Dikul
These exercises are really what you need for a lumbar hernia. I know this firsthand. After a spinal injury, my aunt developed a lumbar hernia. She was against surgery, so she had to come to terms with this diagnosis. At first, the hernia did not interfere and manifested itself only in rare attacks of pain. But over time the situation worsened.
Exercises for lumbar hernia
Valentin Dikul learned from his own experience what a spinal injury is, after which doctors no longer give hope that you will be able to walk. This is an incredible story of healing when, after falling from a height of 13 meters and a terrible injury (he was paralyzed for 5 years), he returned to the circus.

He says: “The doctors told me that I would spend the rest of my life in a wheelchair. But I decided to fight." And he fought and was able to get back on his feet. He developed a variety of techniques for restoring the spine. His treatment method is aimed at relieving pain and restoring the functionality of the spine.

Dikul considers exercises to be the most effective method of treating lumbar hernia of the spine. Their main task is to return muscles to optimal condition. Relax tense muscles and restore tone to weak ones. This famous gymnastics includes only 6 exercises, but they have no equal in effectiveness.
THERAPEUTIC GYMNASTICS BY VALENTIN DIKUL

In this video they tell in more detail and show how to perform exercises for the back with a hernia, developed by Dikul.
There is nothing complicated about these exercises; they are simple to perform and do not require special physical training. This method is based on four postulates that cannot be violated: do the exercises every day, do the exercises for at least 60 minutes, maintain gymnastics hygiene and have an unwavering belief in success. If you follow these simple rules, the pain will certainly subside. Take care of yourself and your health!
Exercises for cervical osteochondrosis are prescribed by a doctor to relieve pain and stop degenerative disorders in the spine. Physical activity, when properly selected and performed, helps to cope with the problem.
The main goal of therapy is to relieve pain and inflammation. This requires physical activity. Training courses should be started immediately after the exacerbation is relieved, during the period of remission. At first, you shouldn’t put a lot of stress on your neck, but you need to increase it.
Exercises for osteochondrosis of the cervical spine strengthen muscles and improve blood circulation. When performing, the back should remain straight.
Basic physical therapy technique:
- you need to start with smooth turns of the head, up to 10 times, you can sit;
- tilt your head down, then return to the starting position, repeat up to 10 times;
- tilt your neck back, pull your chin closer to your head;
- the elbow of the right hand is on the table, the palm of the right hand is on the temple. Pressing your palm on your temple, tilt your head, repeat up to 10 times, then change hands;
- raise your shoulders, pull your head in, hold for 5-10 seconds, then relax, perform 5-6 times;
- massage the back of your head with your fingers without causing pain with your movements.
Gymnastics for cervical osteochondrosis helps with headaches. Suitable for older people and office workers who often work at the computer.
With regular exercise, you can reduce dizziness, relieve headaches and improve your well-being.
The goal of gymnastics is to restore the muscular system of the neck and increase the mobility of the spinal discs. A lesson from a physical therapy trainer will help you create a set of exercises.
Gymnastics for cervical osteochondrosis:
- smooth turns of the head to the right and left, up to 10 times, from a standing or sitting position;
- straining your neck muscles, touch your chest with your chin, hold it a little, relax;
- place your palm on your forehead, tilting your head forward, resist with your palm.
The effects of therapeutic exercises as a treatment for osteochondrosis:
- strengthens the muscular system of the vertebrae;
- fights congestion, removes excess fluid;
- improves tissue elasticity;
- improves posture, reduces stress on the spine;
- speeds up metabolism;
- eliminates painful symptoms.
After two months of gymnastic exercises, my health improves, and severe neck pain caused by osteochondrosis goes away.


What should morning exercises be like?
Morning exercises are not the main element in the treatment of cervical osteochondrosis, but with its help you can improve the patient’s well-being. Exercises in the morning can be done at any age.
The goals of therapeutic exercises for the neck with osteochondrosis:
- improving blood circulation in the brain;
- relief of headaches;
- normalization of general condition;
- restoration of mobility of the spinal discs.
The main principles for the success of morning exercises for cervical osteochondrosis:
- regularity;
- classes should be held at the same time - after sleep, before breakfast;
- when choosing exercises, you need to take into account the age and general health of the patient;
- the lesson lasts about 30 minutes;
- at specific stages a doctor’s supervision is needed;
- exercises are performed smoothly, sudden movements are prohibited;
- When performing this, you should not turn your head sharply.
Contraindications for gymnastics for osteochondrosis:
- vertebral injuries;
- oncology;
- hypertension;
- viral diseases;
- diseases of the cardiovascular system.
Morning exercises are a method of combating osteochondrosis. Performing exercises will help get rid of negative processes in the cervical spinal discs.
Complex for home use
When choosing exercises, take into account the patient’s characteristics, health status, past illnesses, and age.
There are many methods for treating osteochondrosis in the neck. They help restore spinal discs.
Exercises can be done at home in any free minute, with or without additional devices - an applicator, a gymnastic stick.
Exercises can relieve tension and attacks of neck pain. It is better to start in the initial stages of osteochondrosis and scoliosis.
Without accessories
Exercises for cervical osteochondrosis are of two types.
Isometric involves holding the body in one position for some time, then returning to the starting position. There should be no body vibrations during gymnastics. As a result of exercise, flexibility develops and blood circulation improves.
Dynamic - tilting the head in different directions for specific time intervals. These actions relax the muscles and relieve pain symptoms.
Stages of exercises for osteochondrosis of the cervical spine step by step:
- the back remains straight, you need to turn your head to the right side, then to the left;
- the shoulder girdle is raised, hold it in this position for 10 seconds;
- put your hand on the back of your head and resist with your head back;
- The head should be straight, the neck should be arched back.
Exercises for the treatment of osteochondrosis should be given 15 minutes a day.
The training regimen should be systematic, so the blood vessels will work better.
Doctors have developed several methods for treating cervical pathology. Dikul’s gymnastics helps strengthen intervertebral discs and eliminates pain.
Dr. Bubnovsky advises quitting smoking, and when doing exercises, use dumbbells for additional stress on the shoulder muscle groups.
Exercise therapy for osteochondrosis is carried out with a gradual increase in load. The procedure is permissible if your health allows treatment and there is no risk of protrusion or herniation of the thoracic spine.
Types of exercise therapy:
- twisting;
- waving your arms;
- hanging on the bar;
- relaxing movements.
Exercises begin with a warm-up, it gives tone to the neck muscles, warms them up, and prepares them for stress. You can conduct classes to music.
When twisting, the head should be thrown back, then the whole body is twisted. Exercises are performed until warmth appears throughout the body. Arm swings are performed as follows: tilt the body forward, spread your arms to the sides, move your shoulder blades, and perform swings.
Relaxing movements: tense the shoulder muscles and hold them for 15 seconds, back straight, then exhale and relax.
Exercises for osteochondrosis are carried out carefully and, most importantly, not abruptly. It is better to entrust the choice of the complex to a doctor - he will give advice on implementation.
With accessories
Additional attributes of the exercises include the Kuznetsov applicator - a roller or mat with spikes. You can lie on it or tie it to the cervical region affected by osteochondrosis. It is permissible to use 1 time per day for 10 days.
A special tool is used to stretch the spine. This procedure is done as prescribed by a doctor in a physiotherapy room and no more than once a year.
A course of exercise therapy and how long will it take for the neck muscles to become stronger?
Physical exercises for cervical chondrosis should be carried out when the pain subsides and the exacerbation stage has passed. They start with light exercises, then strengthen the complex.
Rules for implementation for osteochondrosis of the neck:
- classes are conducted in a cool room;
- Before exercise, do a warm-up that will warm up the body;
- you can perform self-massage or rubbing with a terry towel;
- you need to breathe through your nose;
- for unstable cervical vertebrae, a soft collar or corset is worn.
Exercises are performed standing, sitting or on all fours, sometimes a lying position is acceptable.
Exercises for cervical osteochondrosis should be performed with a straight back, without throwing your head back. If a patient is diagnosed with stage 3 disease, there is no need to do exercises. A collar is placed around the patient’s neck, therapy is carried out with the help of medications under observation of the body’s reaction.
Exercises are combined with yoga. Classes do not require a lot of space or a gymnasium. They are performed at home and at work.
With regular exercise, you can relieve neck pain, increase muscle tone, and get rid of depression.
The course of training for neck osteochondrosis is 2 months, sometimes it can take longer.


What kind of gymnastics can harm
With cervical osteochondrosis, doctors do not allow certain types of physical activity. There are exercises that have irreparable consequences.
Often, without sufficient information, patients cause harm to the body.
Prohibited exercises:
- When doing a warm-up for cervical osteochondrosis, you often make sharp swings of your arms and legs to involve the whole body in the work, which is often recommended by instructors in the gym. Sharp turns of the head - down, up, left, right, circular movements - lead to pinching of the vertebrae, disruption of blood supply, risk of slipping of the vertebrae, pinching of nerve endings.
- When you place your hands behind your head and tilt it towards your knees, the load on the cervical vertebrae increases, which is unacceptable. Exercises should be performed with the torso; there is no need to strain the neck muscles.
- When exercising in the pool, you do not need to raise your head much above the water, this can provoke a spasm. When swimming, your head should tilt closer to the water. You can float on your back to give your muscles a restful state.
To prevent the disease, you need to adhere to a healthy lifestyle. Questions that arise when performing exercise therapy for cervical osteochondrosis at home should be asked to the treating doctor.