The main advantages of this style are that it does not require large amounts of energy, Here the lightest breath, He promotes muscle development ankle and back and even has an advantage in speed compared to breaststroke (although it is inferior in speed to other styles).
This style, at the same time, is intended not only as a break from other more energy-intensive swimming styles: the backstroke is included in the program of the Olympic Games, competitions in it are held at distances of 50, 100 and 200 meters, and this discipline is also included in the 4x100 medley relay races and 4x200 m. In terms of the prevalence of specialization among swimmers, the backstroke takes second place - after the front crawl, respectively, and in terms of speed data it takes third place.
Backstroke swimming technique very similar to front crawl swimming– only with differences due to being on the back:
- The body is elongated and is on the back; during swimming, the shoulder body makes small turns due to strokes.
- The head is motionless and looks up (as opposed to breast float, in which the head turns to inhale).
- Legs straight and make movements reminiscent of scissors.
- Hands make alternating movements, resembling a mill.
All together it looks like this:

It is important to note that the head itself does not move or turn while swimming on the back - certain turns are made by the body itself and the shoulder body, but head position remains unchanged.
Hand movement technique
 Hand movement technique
 To learn how to swim this style correctly, First of all, you need to master the movements of your hands.
In the back crawl, the arms sweep in turns - while one hand makes a stroke under water, the other sweeps above the surface of the water. This is almost the same as, only the arms rotate in the other direction.
The hand movement cycle consists of 4 phases:
- influx– immersion of the hand in water, starting with the little finger, then turning the hand perpendicular to the body. Unlike freestyle, the release can take less time if the angle between the arm and shoulder line at entry is 20 degrees or more.
- Main part– turning the elbow back and down due to repulsion from the water, then increasing pressure on the hand and subsequent straightening the arm at the hip.
- Exit from the water– turn the palm up with the little finger, quickly move it out. To speed up the process, you should turn your body a little, as if reaching over your shoulder.
- Carrying– at this step, an almost straight arm is carried over the water 180 degrees.
Legs

In this technique, the leg movements are almost similar to the crawl movements, the only difference is that the force is applied from bottom to top, and not vice versa - that is, it’s as if we are pushing water up with our feet.
The legs should be straight - there is no need to bend them at the knees while swimming: the hips should work, not the knee joints.
Each leg in this style seems to make movements reminiscent of a wave.
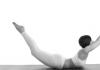
The legs move alternately - as shown in the picture on the left.
Breath
 The moment of inhalation
 Since we are lying on our backs, breathing here is quite simple (unlike): both inhalation and exhalation are done in the air, without any immersion of the head in the water.
At the initial stage of training, it is enough to simply breathe without thinking about any rhythm.
At a more advanced level, the correct way to breathe is as follows:
- while carrying one hand take a breath(it should be sharp so that water does not get into the nose and mouth)
- while bringing the other hand let's exhale(smoother than inhalation).
Maintaining this rhythm will allow you to get less tired and swim longer distances.
More details about breathing are also described in this video:
Common mistakes
 Legs must be straight!
 Despite the general attractiveness and ease of swimming using the back crawl method, not only “dummies”, but also more advanced swimmers can make mistakes in this style.
Let us briefly describe the most common mistakes, especially those made by beginners:
- "Sitting" on the water– the position of the shoulder girdle is too high compared to the pelvis. To avoid this mistake, you should try to stretch out as much as possible in the water and take as horizontal a position as possible.
- Hasty start of the stroke immediately after entry, without capturing water. Instead, try to apply force during the stroke (using the shoulder joint, not the arm).
- Excessive tilt of the head back. The head should be a continuation of the body and should not be thrown back or forward.
- Care of the brush behind the head- both during the passage and during the influx. The arms should be carried straight and parallel.
- Bend in the knee area, as a result of which the blow is not full force. The legs should be straight and only slightly bend at the knee, making wave-like movements.
Both in backstroke and front crawl the leg works through the movement of the hips, and not due to the bend in the knee!
- Imbalance in the amplitude of leg work: a large swing contributes to a loss of speed, a small one does not allow it to be gained.
- Unbalanced body movements: “roll” or “under-roll”.
Exercises for Beginners
On the land

In order to master this style of swimming well, in addition to practicing in the pool, you should pay attention to preparation on land:
1. Repeating arm and leg movements under the visual supervision of a mentor.
2. "Mill" forward and backward - to improve the functioning of the shoulder joints.
Also, do not forget that before swimming (both on the back and any other style) it is important to do a general warm-up.
In a swimming pool
Classic exercises in water to train this method of swimming are:
- Swimming with a board: we swim on our backs, our arms are extended and hold the board, only our legs work. This exercise allows you, at the initial level, to learn how to use your legs correctly, and at a more advanced level, to train their strength (for this you need to work with them intensively) and hone your technique.
- Swimming with a “kolobashka” in your feet– here we train only hand work. This exercise can be difficult at the beginning, so don't be discouraged if it doesn't work out right away.
Analysis of the water launch technique. Video
 Start from the side of the pool
 If you are practicing in the pool and have already passed the initial level, then you may be interested in starting correctly from the edge of the pool.
At competitions, after the first sound signal, the athlete jumps into the water and returns to the starting position.
After the second signal, he is slightly pulled up. And after the siren, he makes a sharp push back, arching his back and entering the water with his hands.
The step-by-step start looks like this:
- Initial position– Feet rest against the wall of the pool, toes are at the edge of the water (some teachers say that the big toes should touch the edge of the black line), knees are bent. Hands hold the handrails, being absolutely straight.
- Push performed after a slight upward swing. Next comes a swing of the arms back over the top, the legs push off the support with all their strength.
- Flight represents an elongated body, arched at the back.
- Entering the water It starts with the hands, then, after the head and shoulders, the whole body enters, ending with the feet. After entering the water, the chest ceases to be a “wheel”, the body stretches out, and begins sliding underwater, lasting 2.5 - 3.5 m, starting from the start.
- Then they come to the surface of the water and begin swimming.
Here's a 10-second video that shows it all clearly:
After the start, When sliding underwater, it is recommended to make movements in order to move faster. However, this technique is largely intended for professionals; at a beginner level, it is enough to simply learn to push and slide - underwater or at least on the surface of the water.
We hope that the tips from this article will help you quickly and correctly master this style of swimming and enjoy it both in the pool and when swimming in open water!
At this stage, the technique of swimming crawl on the back and front is studied.
We will give preference to back crawl swimming, since this method, unlike front crawl, does not have complex breathing techniques, which allows you to quickly move on to swimming relatively long distances.
Before moving on to exercises to study the technique of crawl swimming on the back and front, you should familiarize yourself with the technique of performing individual elements of these swimming methods.
Swimming technique: back crawl and front body position
When swimming on the back crawl, the body occupies a relatively high, close to horizontal, well-streamlined position in the water. The shoulder girdle is located slightly above the pelvis, the pelvis and thighs are located at the surface of the water. During swimming, the shoulder girdle rotates to the right and left around the longitudinal axis of the body. These twists help you perform powerful arm strokes underwater and arm movements above the water with minimal strain. The head lies with the back of the head on the water so that the earlobes touch the water.
In front crawl, the body occupies a fairly high, elongated and well-streamlined position, the shoulders are somewhat raised above the hips so that a small angle is formed between the longitudinal axis of the elongated body and the surface of the water. The face is lowered forward and down into the water, the water level passes at the hairline or eyebrows. During swimming, it is permissible for the body to oscillate to the right and left relative to the longitudinal axis. The greatest rotation of the body occurs in the direction of inhalation.
Leg movement technique when swimming
In back crawl, the legs perform alternating movements from bottom to top (working movement) and from top to bottom (preparatory movement). When performing working movements, the swimmer raises the hip up until the knee is at the very surface of the water, but not above the surface.
During this movement, the thigh pulls the shin upward (since the water presses down on the shin, the leg bends at the knee). As soon as the knee approaches the very surface of the water, the swimmer begins to move the thigh down, and the shin, moving upward by inertia, should make an overwhelming movement, reminiscent of a whiplash. At this moment, you need to throw the water with your toe to the very surface. The shin then moves down behind the thigh. The legs move alternately up and down, one after the other, without touching. The tables are relaxed, the toes are not tense and turned inward.
The technique of leg movements when swimming front crawl is as follows: the legs alternately perform exactly the same whip-like movements from top to bottom (working movements), and then up to the starting position (preparatory movements). During the movement from top to bottom, the leg is consistently bent at the hip and knee joints, the feet are relaxed and slightly turned inward. Having reached the lowest position, the thigh begins to rise up, and the lower leg continues to move downwards by inertia, strikes like a whip, and then rises up with the thigh to a horizontal position. The cycle of movements is repeated, the range of movement of the legs is 30 - 50 cm.
The back crawl is an alternation of continuous movements of the arms and legs. It differs from other methods of swimming in the position of the body and the method of breathing (exhalation is performed above the water). In terms of speed of movement, the back crawl is in third place after the front crawl and dolphin crawl. In practical swimming, it is used to transport the victim, carry various loads and tow them through the water.
The backstroke is used in swimming competitions at distances of 100 and 200 m, in medley swimming at distances of 200 and 400 m (the second segment is 50 or 100 m), as well as in the first stage of the 4 X I00 m medley relay.
Each completed cycle in the back crawl consists of two alternating arm movements, six alternating leg movements, one inhalation and one exhalation. This version of the technique is called the six-beat back crawl, and is the most widespread.
Movement technique
Starting position - one hand is in the water in front of the shoulder joint, the other has completed the main part of the stroke (the hand is near the hip), one leg is below, the other is at the surface of the water. From and. p. one hand makes a grab, the other comes out of the water and begins to carry it, one leg strikes from the bottom up, and the other goes down. Continuing the movement, the first hand performs the beginning of the main part of the stroke, the second passes through the middle of the stroke, the first leg moves down, and the second performs an upward kick. Then the first hand carries out the second half of the main part of the stroke, the second finishes the sweep and enters the water, the first leg makes an upward kick, and the second moves down. Next, the first hand comes out of the water and begins to carry, the second makes a grab, the first leg moves down, and the second from the bottom up. At the next moment, the first hand is in the middle of the stroke, the second performs the first half of the main part of the stroke, the first leg performs an upward stroke, and the second goes down. The cycle ends when the first arm finishes the sweep and enters the water, the second finishes the main part of the stroke, the first leg goes down, and the second kicks up.
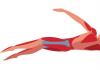
Body position. The swimmer is at the surface of the water in a well-streamlined, close to horizontal position, his shoulders slightly raised. The head lies on the water, face up, and the chin is pressed to the chest. The water level should be slightly above your ears. The swimmer oscillates around the longitudinal axis of the body (Fig. 1).
Figure 1. Swimmer's body position during backstroke swimming.
When swimming backstroke, the legs move continuously from top to bottom and bottom to top. These movements help keep the swimmer horizontal in the water, stable on the surface, and maintain a constant forward speed. The upward movement of the leg is called rowing (working), and the downward movement is called preparatory.
Preparatory movement (top to bottom). The straightened leg with a relaxed foot is at the surface of the water. Next, the straight leg extends at the hip joint, passes through a horizontal position, and moves downward, while bending at the hip joint (backward). Then the leg begins to bend at the knee joint, while the lower leg and foot continue to move down, and the thigh moves up, while extending at the hip joint. When the angle between the front surface of the thigh and the torso (at the hip joint) is approximately 130-140°, the movement of the leg from top to bottom is considered complete.
Labor movement (from bottom to top). The upward movement begins with sequential extension of the leg at the knee and ankle joints, and at the ankle joint it extends at the very end of the stroke. The thigh flexes at the hip joint. In this case, the entire leg (thigh, lower leg and foot) moves upward. When the knee joint reaches the surface of the water, the thigh begins to move downward (extending at the hip joint), ahead of the lower leg and foot, which continue to move upward. With an advanced movement of the hip, the leg quickly extends at the knee joint and thereby increases the speed of the whip-like movement of the foot up and back. As a result, the foot creates a traction force that propels the swimmer forward. When the leg straightens at the knee joint, the working movement is considered complete.
Coordination of movements. One leg moves up from the lowest position, and the other moves down at the same time. As the swimmer's speed increases, the amplitude of leg movements decreases.
Hand movements. When swimming backstroke, the swimmer's progress occurs due to the movements of his arms. The cycle of movements of one hand occurs in the following sequence: the hand enters the water, a grip occurs, the main part of the stroke is performed, then the hand exits the water and carries it above the water.
The straight arm is lowered into the water, after being carried through the air, parallel to the longitudinal axis of the body, or at a certain angle to this axis. When immersed in water, the palm should be facing outward and the hand should be rotated so that the little finger enters the water first. As soon as the hand enters the water, the swimmer begins to rotate around the longitudinal axis in the direction of the hand that entered the water. This contributes to a faster lowering of the straight arm down and forward. As you lower, the arm bends and the hand moves forward - down - out and grabs the water. Continuing the movement down - forward - to the side, the arm bends at the elbow joint, while the elbow goes down, and the hand is immersed in the water and is located perpendicular to the direction of body movement, remaining above the elbow.
The main part of the stroke begins when the hand moves back and up due to flexion of the arm at the elbow joint and rotation of the forearm. When moving backward, the arm turns the rowing surfaces along the body and bends at the elbow joint. The hand rises to the surface of the water (without disturbing it), and the elbow remains turned down. Then the hand passes the line of the shoulder, the arm gradually extends at the elbow joint and completes the main part of the stroke. Here the arm is fully straightened and the hand is lowered. Throughout the entire main part of the stroke, the hand provides maximum traction force that occurs on the rowing surfaces of the forearm. And the rotation of the swimmer around the longitudinal axis enhances the stroke movement.
To release the hand from the water, the swimmer turns the palm to the thigh and successively lifts the hand, forearm and shoulder out of the water. Then the hand begins to move above the water. The straight arm sweeps over the water in a vertical plane passing through the shoulder joint. During a steady stroke, the palm rotates outward and moves in accordance with the stroke speed of the other hand.
Coordination of movements. When the first hand is in front, in the catching phase, the second is removed from the water and begins to carry. Then the first hand performs the main part of the stroke, and the second one sweeps over the water and enters the water. After this, the first hand rises from the water and begins the carry, and the second finishes the grab. The first hand then swings over the water and into the water while the second hand does the bulk of the stroke. Then the hand movements are repeated.
The forward movement when swimming on the back is evenly due to minimal breaks in arm movements: at the moment the main part of the stroke is completed with one hand, the other should begin this part of the stroke as early as possible.
Breath. The back crawl is characterized by the fact that breathing here does not depend on environmental conditions, because inhalation and exhalation are performed over water. However, even in this method, breathing should be continuous and rhythmic. Inhale through a wide open mouth while raising your hand above the water, exhale during the stroke and exit of this hand from the water.
Exercises used when teaching the back crawl method
1. Sliding in a supine position.
2. Studying leg movements while lying on your back at the edge of the pool and holding the edge with your hands.
3. Sliding on your back, crawl style kicking.
4. Sliding on your back. The arms are extended along the hips. Footwork. The hands perform supporting movements with a small amplitude (without removing the hands from the water).
5. Sliding on your back with crawl leg work. Row with the right hand to the thigh. Left hand stroke. Sliding with footwork, arms extended along the hips.
6. Exercise 5, but with an attempt after the stroke to bring your hand above the water to the starting position.
7. Attempts to swim the back crawl 5-10-15 m.
Some of the exercises used when teaching backstroke are used when teaching front crawl and are described in the previous section.
Learning to swim on the backstroke should be carried out in parallel with learning to swim on the front crawl, alternating similar exercises for swimming on the front and on the back.
When swimming on the back, beginners often make the following mistakes.
1. The swimmer’s body is bent at the hip joints. The swimmer “sits” in the water.
Correction method: repeat exercises 1, 2, 3, 4, 5.
2. The swimmer works with his legs without bending his knees. Correction method: swimming on the back and on the chest with one leg work.
3. Hands are placed on the water too narrow or too wide. The stroke begins too early, at a time when the hand has not yet been completely immersed in the water.
Correction technique: repeating exercises 5 and 6, calm swimming, focusing on correcting the error.
Good day to all Start-health visitors!
I decided to continue our series of articles devoted to different swimming styles. In principle, my decision cannot be called unexpected, because due to a back injury, I have to recover in the pool.
I have already written about the benefits of a swimming pool specifically for the spine.
In order not to harm my own health, I was forced to consider the advantages and disadvantages of the main methods of movement in water.
Despite the fact that my classes were agreed upon with my attending physician, I chose the healing method on my own.
By the way, it is really important to approach the learning process with full responsibility, because the result directly depends on the direction of physical exercise.
For example, I want to return to strength training with iron as soon as possible, so it is important for me not to put too much strain on my spine.
Actually, I’ll move closer to the topic of the article. Today's article topic: “backstroke technique for beginners.”
Features of backstroke swimming technique
In order to cover a large amount of material at once, I decided to summarize the variety of information posted on the Internet on breaststroke and backstroke.
Indeed, both of these techniques have a place in the “arsenal” of professional athletes and novice swimmers.
You can learn each of the above methods through various training and physical activities. However, these techniques have many similarities that distinguish backstroke from other styles:
- Body and head.
The body is positioned horizontally relative to the water surface line, so the swimmer has the opportunity to breathe unhindered. It should be noted that the neck muscles should be relaxed and the gaze should be directed upward.
At the moment when the swimmer extends his arms behind his head, the water line should be at the level of the ears, hiding them.
- Legs.
The main load when swimming on the back falls on the muscular structures of the thighs. It is enough for the athlete to carry out traditional upward/downward translational movements - a comparison with “scissors” would also be appropriate here.
I will also say that the distance between the limbs should be about 15–30 cm, and immersing them in water implies a depth of 15–20 cm. During the “work”, the swimmer’s legs are mobile exclusively at the knee joint.
- Hands.
Such a cycle of movements invariably implies three phases that determine the sequence of the athlete’s actions - capture (plunging one hand into the water with the little finger forward), pulling (carrying the pushing limb towards the hip) and return (exiting the water column, implying a return to the starting position).
It is important to take into account that the technique is a loop, which means that after the last stage the first one necessarily begins.
- Breath.
As in any other style, in order to correctly perform a set of movements, it is important to devote time to the preparatory stage, not forgetting about the work of the respiratory tract.
Athletes do not have problems with air flow when swimming on their back, but neglecting the advice of professionals is not a practical solution.
Remember, friends, inhale exclusively through your mouth, and exhale through your mouth and nose. It's quite simple!
True, now I myself don’t quite have the correct breathing technique. But, I'm working on it. ?
In the world of sports, backstroke swimming is deservedly considered the third sport after butterfly, with which you can quickly cover a certain distance in the water.
It should be noted that this statement implies a movement technique that involves alternate work of arms and legs. No matter how hard you try, it is simply impossible to achieve the same speed in the backstroke.
I would also like to note that a similar technique is effectively used in applied swimming, where it is used to move victims in the water. Often, rescuers have to tow a wounded person to shore.
It is with the help of this method that you can rationally spend your own strength, saving the lives of others, so you should not underestimate the importance of the back breaststroke either.
Important clarification: “Swimming on the back is accompanied by general rules that we have already discussed. However, this method does not require a clear position of the arms and legs - everything directly depends on the style chosen by the athlete himself.
A swimmer can move in the water with freestyle or breaststroke, perform synchronized or alternating kicks with the feet, use arms alternately or simultaneously - again, the technique of movement is determined in accordance with the method that the athlete adheres to.”
Having dealt with the main aspects that distinguish backstroke from swimming, you can move on to the next one, which I decided to devote to beginner swimmers.
Learning to move in water in this way is quite simple - the main thing is to adhere to the following recommendations:
- Start practicing on land, systematically repeating the sequence of movements that you will follow in the water. Such exercises will greatly facilitate your exercises in the pool, because such a technique will already be familiar and understandable. In other words, you will quickly get comfortable in the water.
- During training, pay attention to the position of the body and head - if the body must remain mobile, then the face is always above the water, and the gaze is directed to the feet.
- Many professional instructors advise starting training with additional accessories. For most athletes at the training stage, foam cubes and special products filled with air and worn on the hands become indispensable.
- Remember that the chest must be raised, but at the same time the ears are invariably hidden under the thickness of the water.
- The main thing in backstroke is to learn to balance on the surface without using your hands. Try to move only using your legs, concentrating on keeping your head above the water at all times.
- Try to place your hips as close to the surface as possible so that you can easily push your legs and balance easily on the water.
- Do not forget that the torso should turn towards the hand with which the athlete makes the stroke. This way, you create a dynamic pace of movement, which means you move much faster.
An interesting video from Evgeny Korotyshkin on mistakes and more. (We skip the Coca-Cola advertisement. All the charm of this drink is outlined.)
Backstroke technique- This is an effective way to save your own energy by safely reaching the shore in an emergency. Using this method, you can not only quickly cover the distance on the pool path (), but also relax while balancing on the surface of the water ().
In general, I can rightfully classify this style as one of the sought-after and irreplaceable techniques present in the “arsenal” of a modern swimmer. This is why I advise you to overcome your fears, be patient and learn. ?
By the way, to make it easier for you to visualize the material you read, I traditionally included many photos and videos in the article.
Educational information: “Most athletes classify backstroke swimming as crawl, because athletes predominantly move in the water in this way.
However, such a statement is unfounded - such a technique is considered to be freestyle, because swimmers who master different techniques have the opportunity to independently combine movements, combining different options.
Only the position of the body remains unchanged - the athlete must be positioned on his back.
It should be noted that at professional competitions there are various disciplines that involve the compilation of several types.
Athletes know in advance the rules and restrictions that must be adhered to, so they are pre-determined with the preferred movement technique for starting, covering the distance, turning and finishing.”
I am sincerely interested in answers to the following questions: How many of our readers know how to swim on their back? Which style do you prefer - crawl or breaststroke? Perhaps you have learned to combine different movement techniques differently?
Bye everyone, guys! Be healthy and happy - this is the most important thing!
And finally, one more video to pin. ?
Back crawl similar to an inverted front crawl - the athlete also performs alternating strokes with his arms and at the same time makes alternating kicks in the vertical plane (up and down). The athlete's face is almost constantly (except for starts and turns) above the water, which makes this method of swimming very convenient for moving through the water. This is not the fastest swimming style, but it can be swum faster than breaststroke.
Back crawl swimming technique
The cycle of movements when swimming back crawl consists of two alternating movements of the arms (stroke), alternating movements of the legs, inhalation and exhalation. For one arm stroke there are three kicks (as in the six-beat front crawl). The main traction force is the arms, the movements of the legs maintain the speed of advancement and ensure a stable horizontal position.
Body position
Stretched out horizontally just below the surface of the water (the water level is at the ears, under the chin and right at the chest, the shoulders are slightly raised, the pelvis and legs sink deeper). The angle of attack during fast swimming reaches 6-8°.
Hand movement
The cycle of arm movement can be divided into phases similar to the phases of arm movement when swimming front crawl, but different in duration:
- influx begins from the moment the hand is immersed in water (along a line conventionally drawn along the line of the body through the shoulder joint) from above along the entire length of the arm, the hand enters with the little finger down. Towards the end of the supporting part, the swimmer turns the hand perpendicular to the movement. Compared to the front crawl, the build-up and support part of the stroke can be shortened in time if you place the arm outward from the shoulder line; the angle between the arm and shoulder line can reach 20° or even more.
- Main part of the stroke. The arms and hand are oriented to create the greatest propulsive force. The stroke is performed by energetic push-off, with the elbow partially turning back and down. As the stroke progresses, the pressure on the hand increases evenly. At the end of the stroke, the arm straightens, the stroke ends behind the pelvic line.
- Hand coming out of the water. The hand turns with the edge towards the surface (little finger up) and is quickly taken out of the water. To speed up the process, it is necessary to move the shoulder joint upward and turn the body along the longitudinal axis towards the surface of the water (as if we are helping with the shoulder).
- Carrying. The arm is almost completely straight. The trajectory of the hand through the air is individual and can take place both in a vertical plane and closer to the water.
Leg movement
As when swimming front crawl: the swimmer’s legs, rhythmically and moderately bending and unbending at the hip, knee and ankle joints, move alternately up and down. But at the same time, the direction of the most effective strike is from bottom to top (in the front crawl it’s the opposite). The leg moves almost straight from the surface of the water from top to bottom, and only after crossing the body level line does it begin to bend. The movement from bottom to top is characterized by vigorous extension of the leg at the knee, while the thigh is ahead of the lower leg and foot. As the speed increases, the leg bends more at the knee before the downward strike, and the foot partially leaves the water.